(Investigate) Choose your favourite title sequence!
(Investigate) Choose your favourite title sequence!
I was unable to choose between the two, they are from the same series but the intros to different seasons.
They use a variety of layers, effects and have great visual narrative.
Introduction to Adobe After Effects –
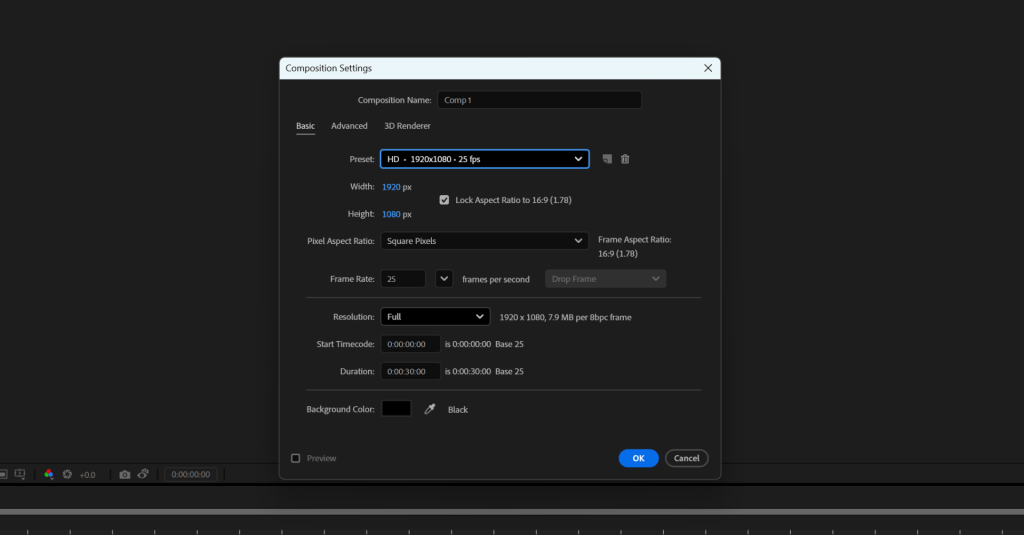
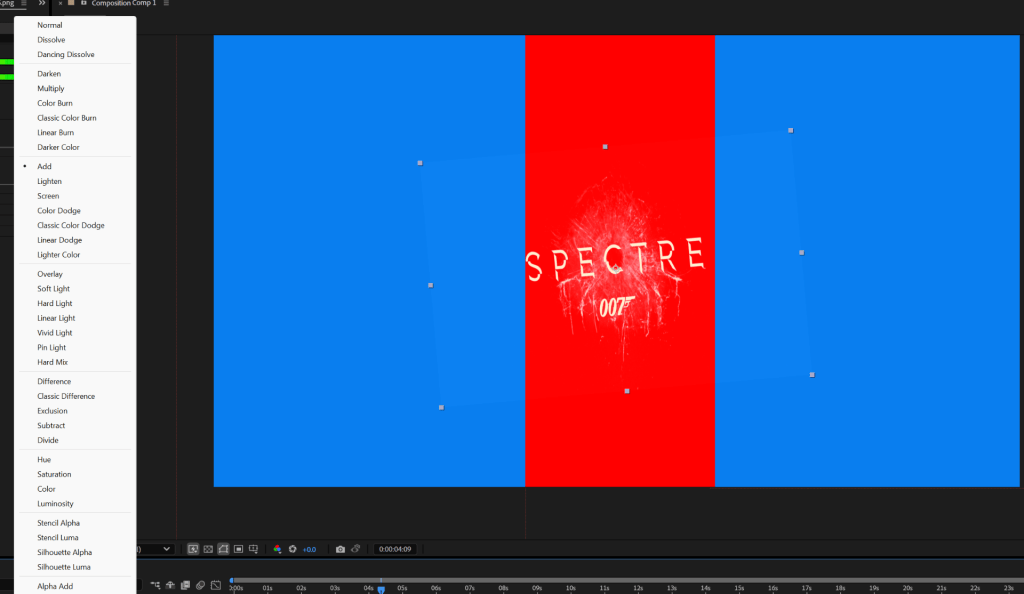
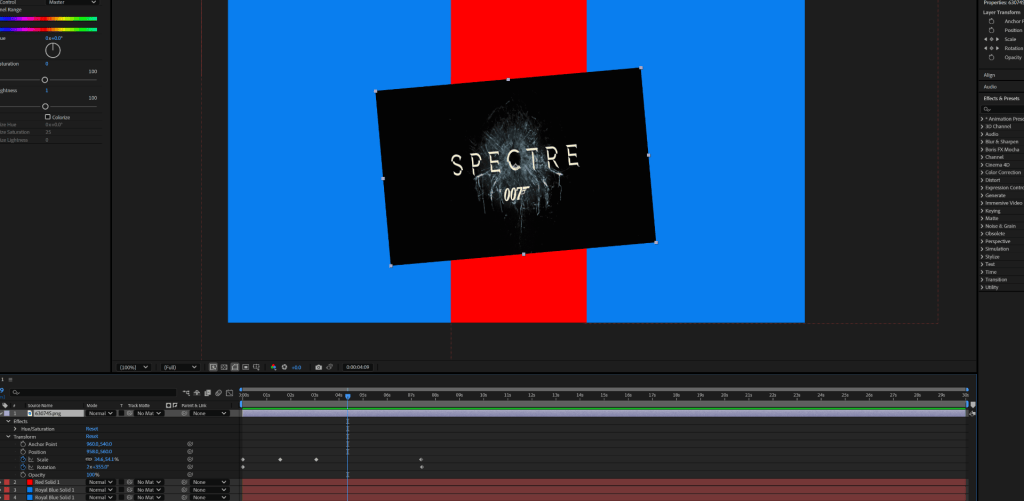
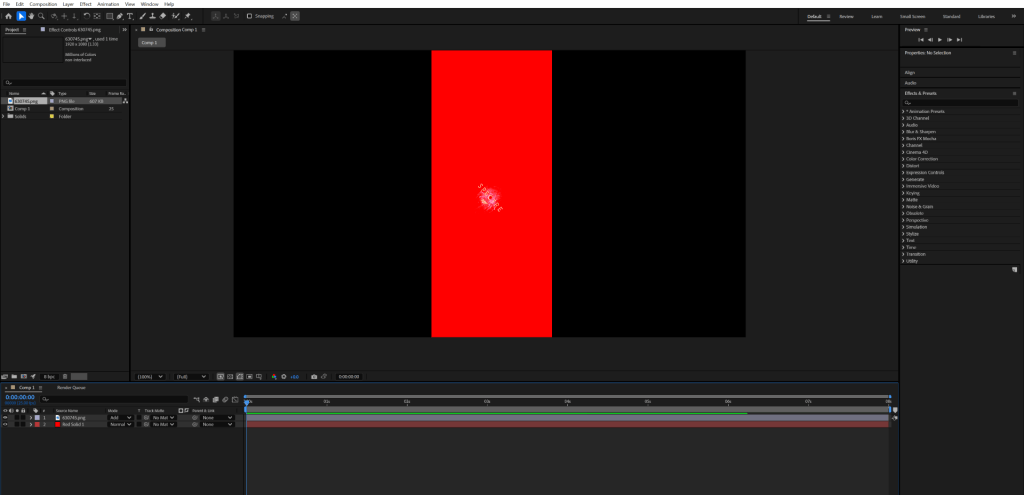
FINAL VERSION:
Creating moving circles:
Create a Dr. No Sequence
These activities will help you to deepen your understanding of this week’s materials and to prepare for the module assessment.
You should complete these activities by [week 2]:
Activity 1
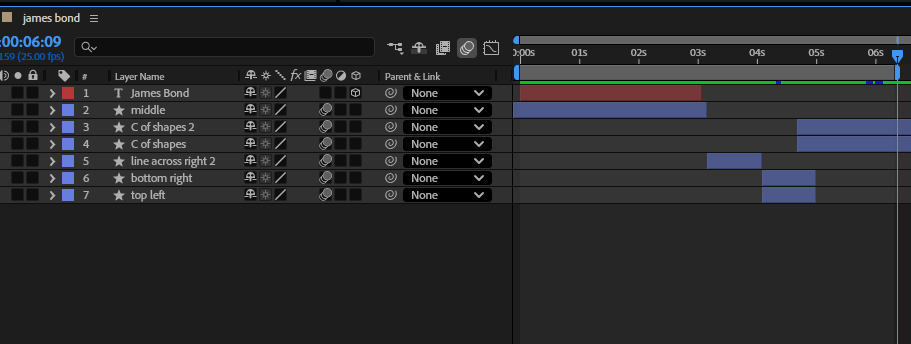
- Using the same tools and processes that we learnt in week 1, see if you can copy this Dr. No sequence and make your own in After Effects
WEEK2: Working with Layers and Masks
In todays lessons we looked at layers and masks.
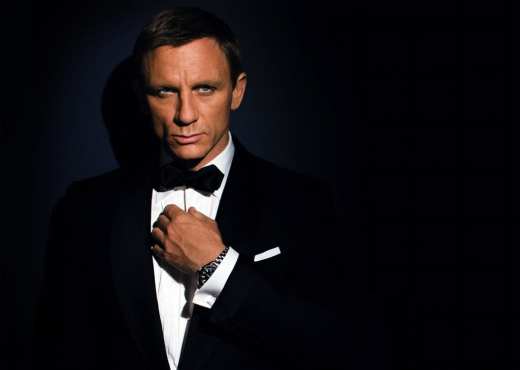
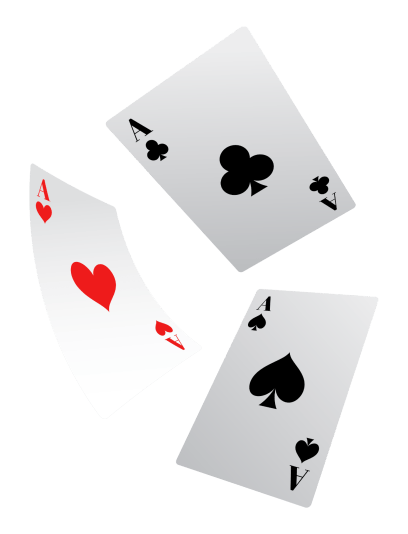
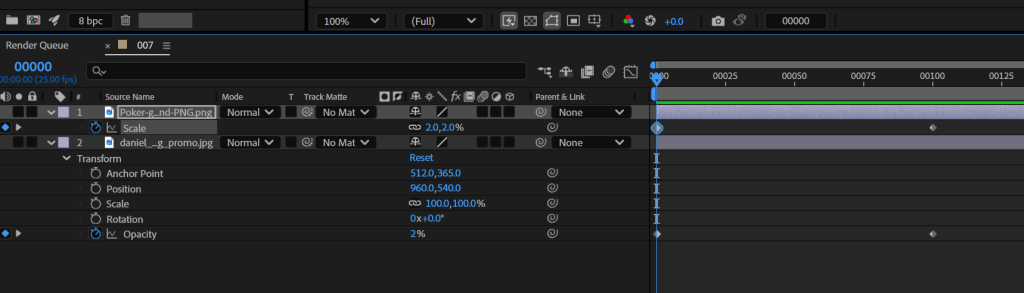
To begin with I took two images and created a short render, I used layering and then used keyframing to rotate and scale the cards layer.
I also keyframed the opacity for the subject behind.
THE RENDER:
Later i added motion lur outside of the render.

THEN I STARTED TO:
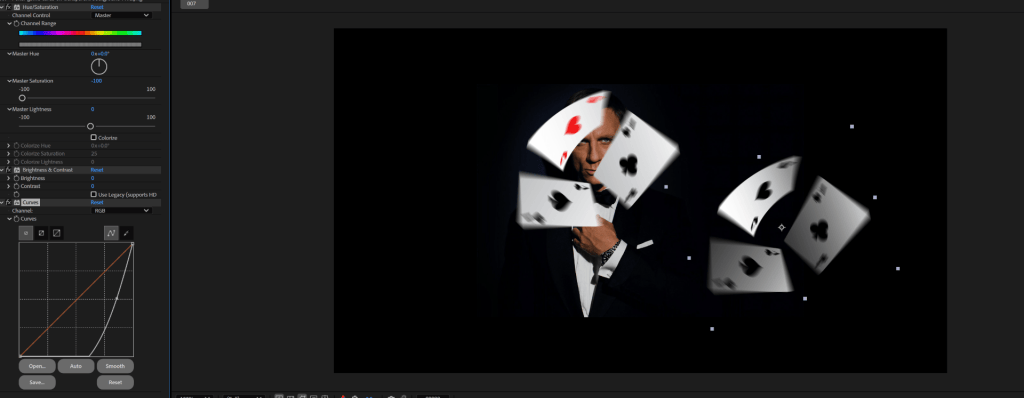

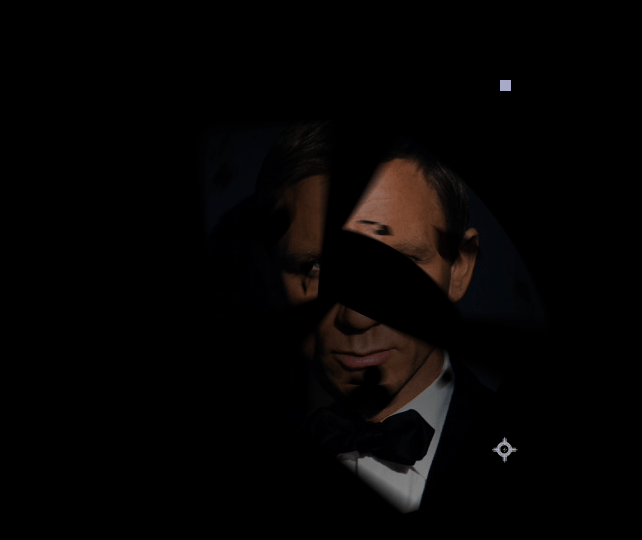
RENDER 2
RENDER 3
RENDER 4:
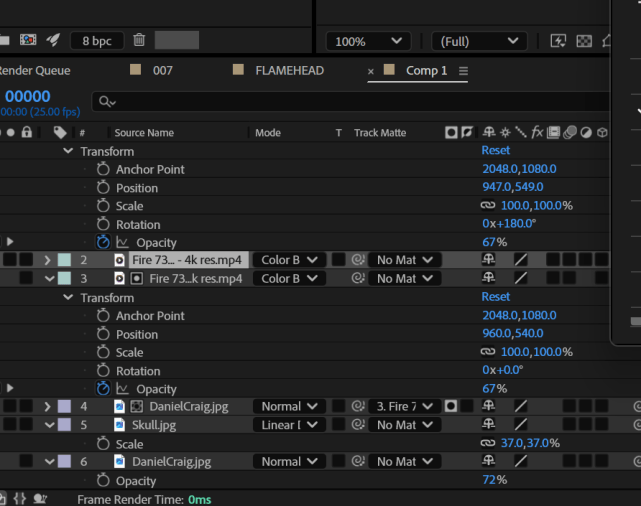
The rest of the lesson comprised of using assets to create a flaming skull. To create mine i changed the blending modes of the fire to create a smoke like trail as well as the change the pixel look on the skull layer. I added a mask to the eyes of James bond to layer above the skull.
In todays lesson we attempted to key green screen plates/use chroma key. Chroma keying is a used to remove a specific person, image, object or target from a coloured background, which is more often than not green or sometimes blue. can be composited onto a different background.
HERE ARE SOME GREEN SCREEN PLATES:
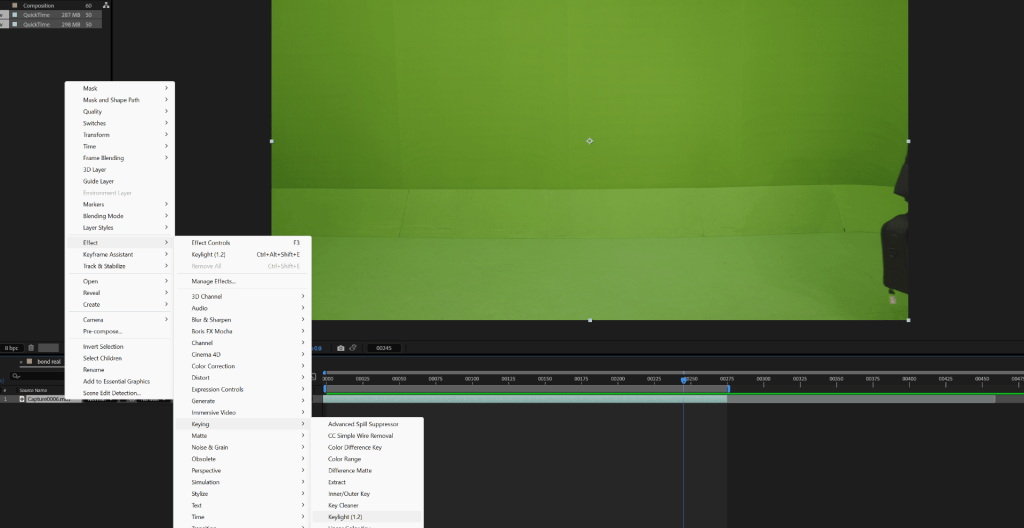
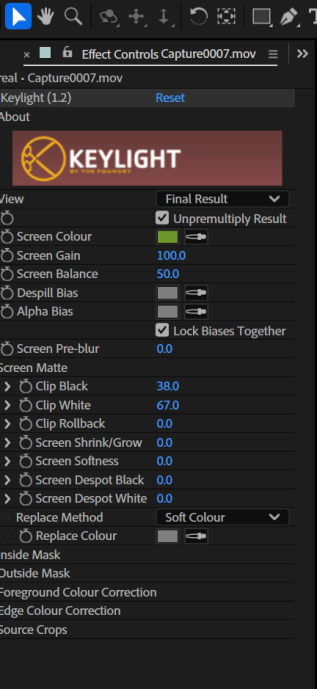
Using these plates in after effects I was about to use Key Light2.1 to remove the green and used different tools to blend and soften the edges. From there I composited.
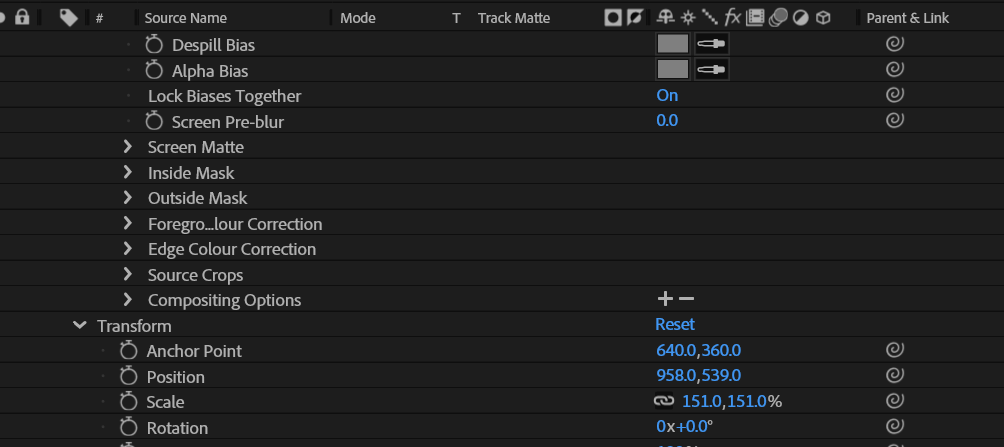
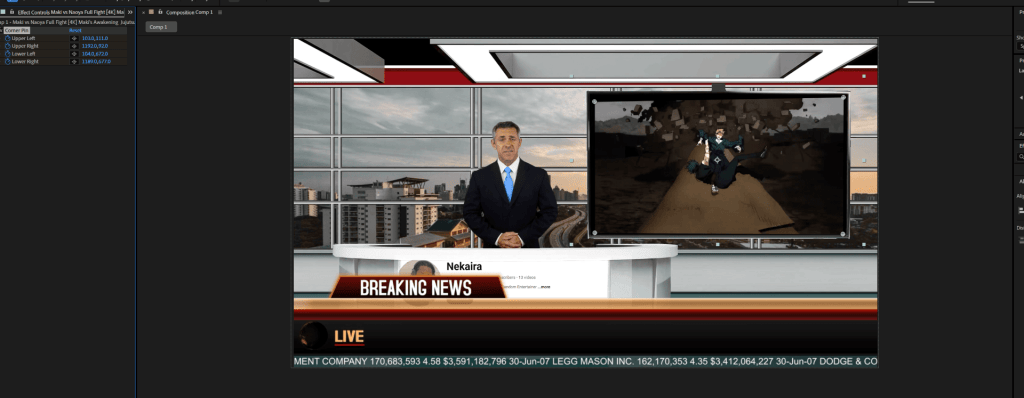

I used a range of different techniques like ‘pin corner’ to animate the movement of the footage that would later appear on the virtual screen.
Task 2:
Practice Task: 007‑Style Silhouette Test (Using existing footage)
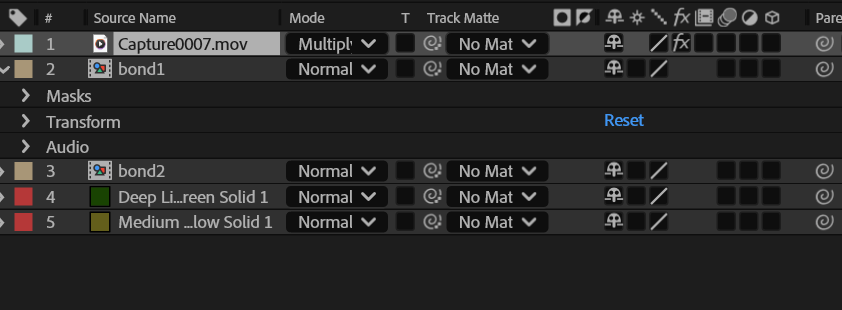
To finish off I then took my own ideas and try to create them in after effects using what I had learned with track matte and applying the same principles to the circles sequences I had animated. I used a blending option called multiply to also make the effect work. The use of precomposing was also necessary to keep effects separate and keep my track tidy.
week 5:
In todays lesson we experimented using our own green screen footage. we took move advanced steps into cleaning our green screen plates as well as looking at using stock footage such as smoke that could be used as a track mask with our silhouettes
Looking at the themes and gambling aspect of James bond has made me really like the idea of incorporating them into my design. to try and create some I used a shape layer and tampered with the stroke settings to animate a spin motion.
To finish off the lesson I brought in my two ideas and put them together. combining the smoke mask with the silhouettes. the animation of the spinning stroke in the shape laye.
JAMES BOND INTRO:
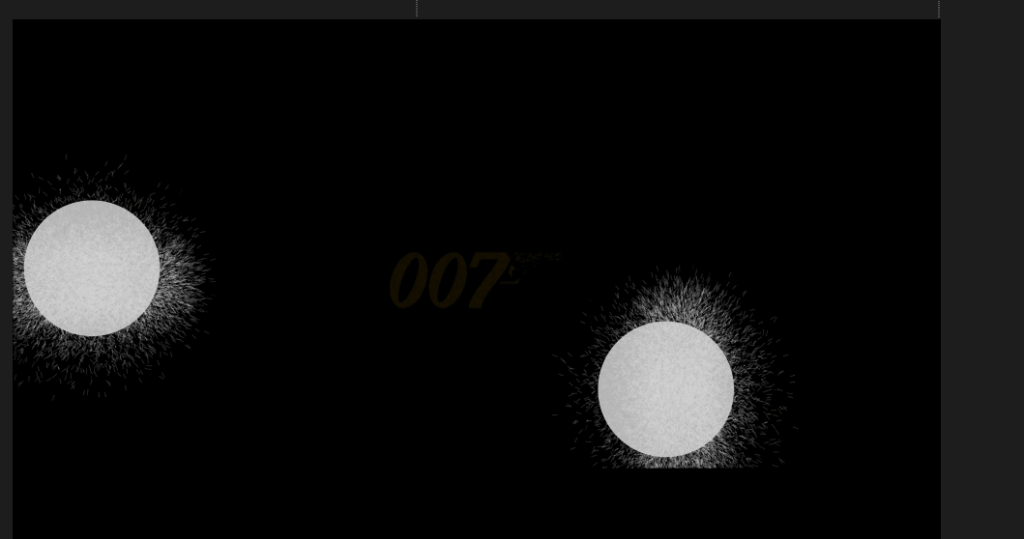

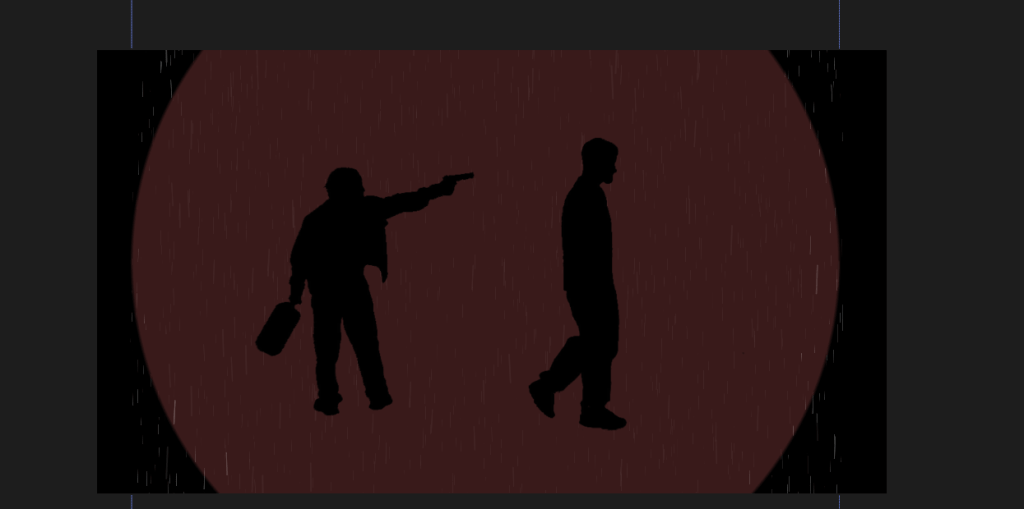
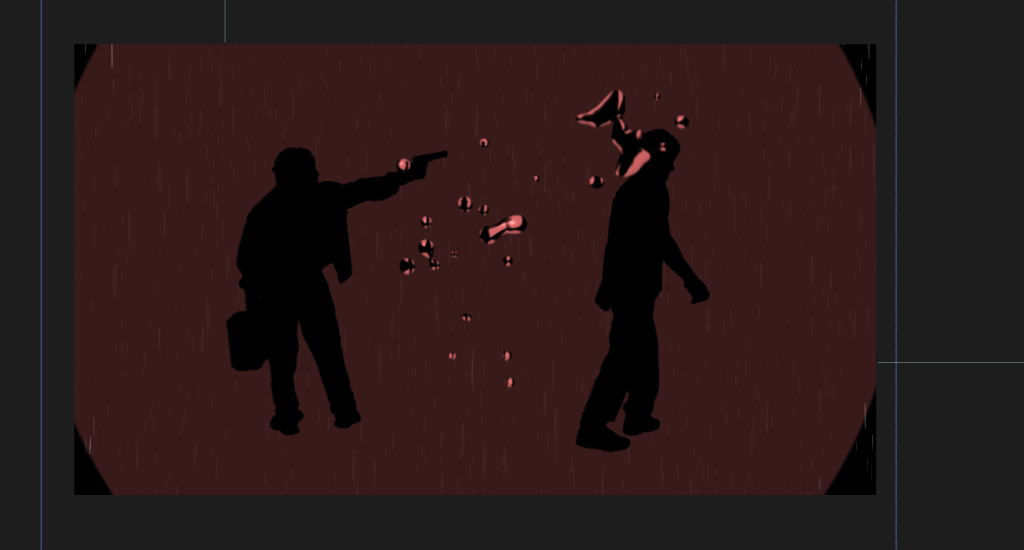
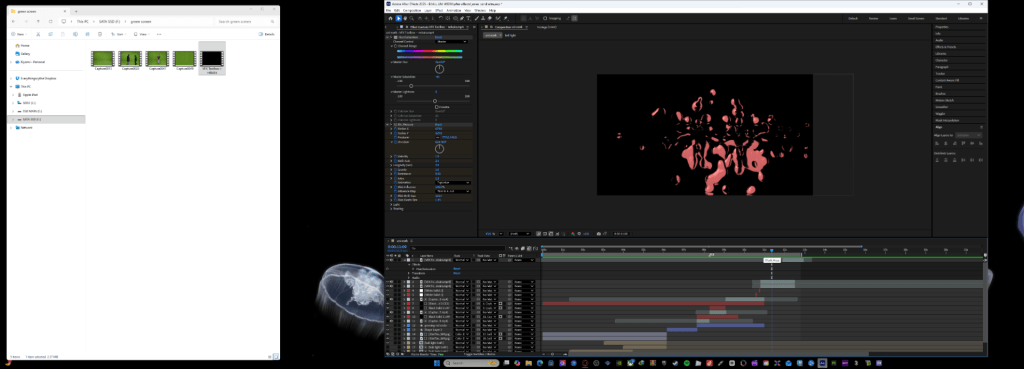
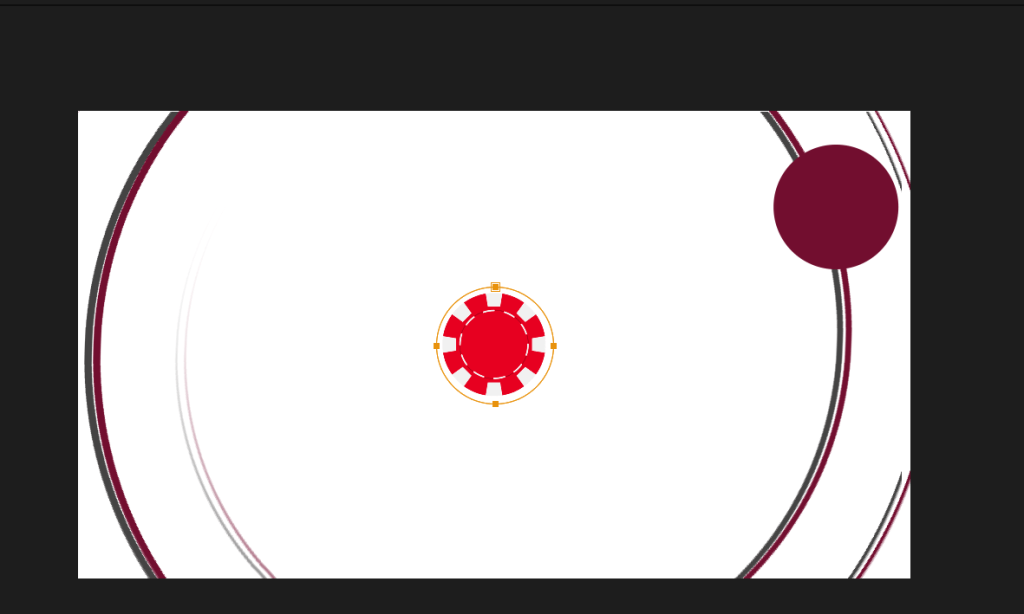
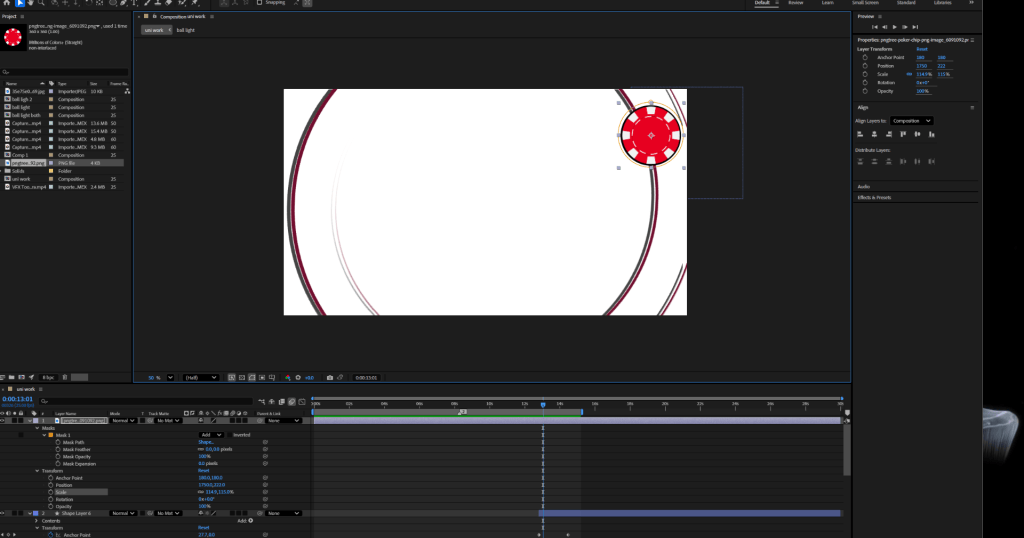

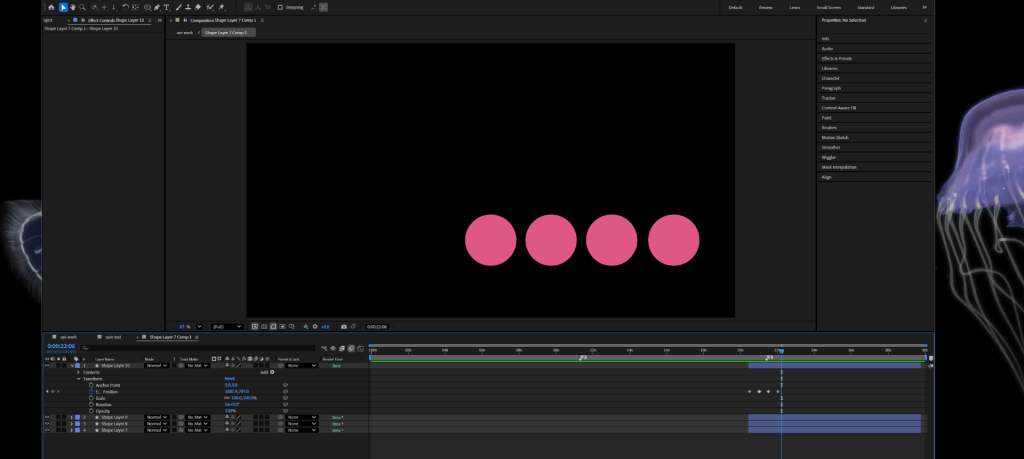
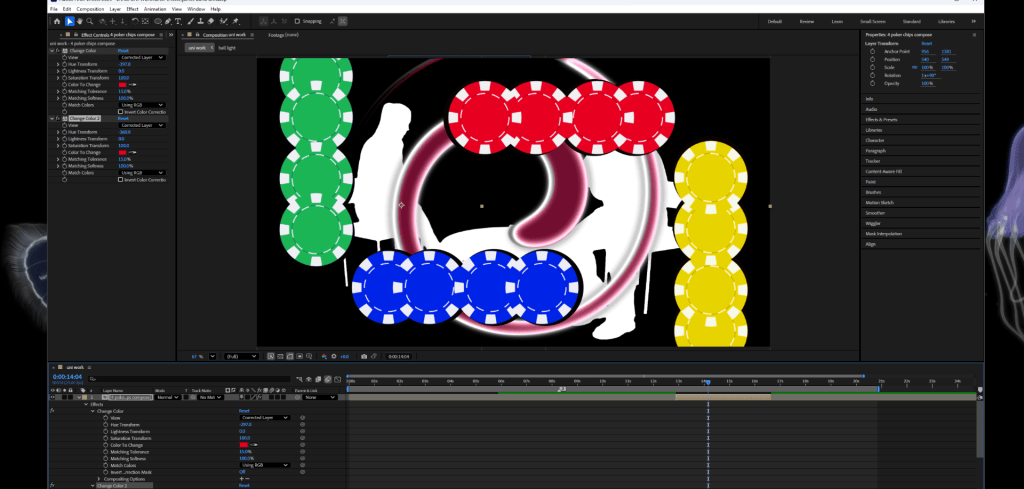
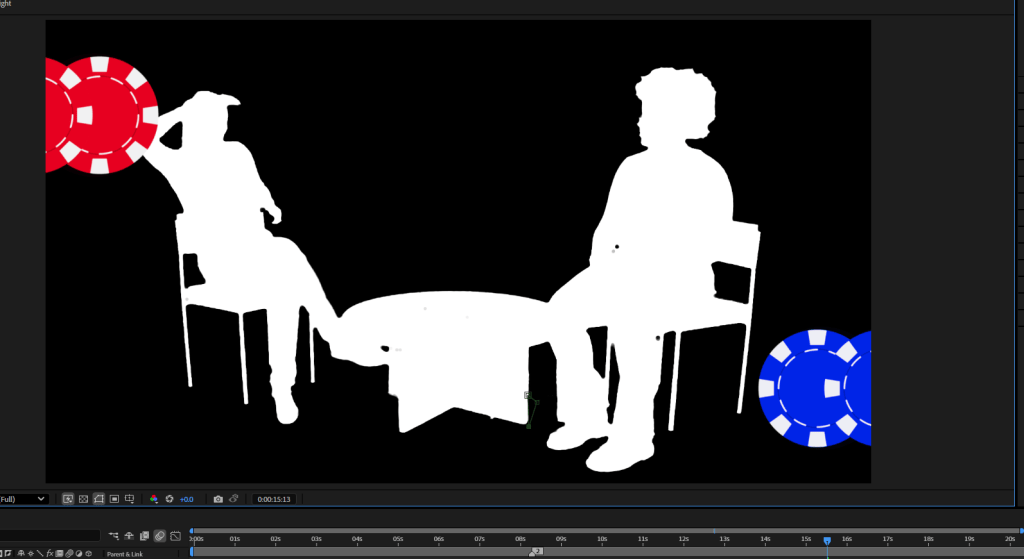
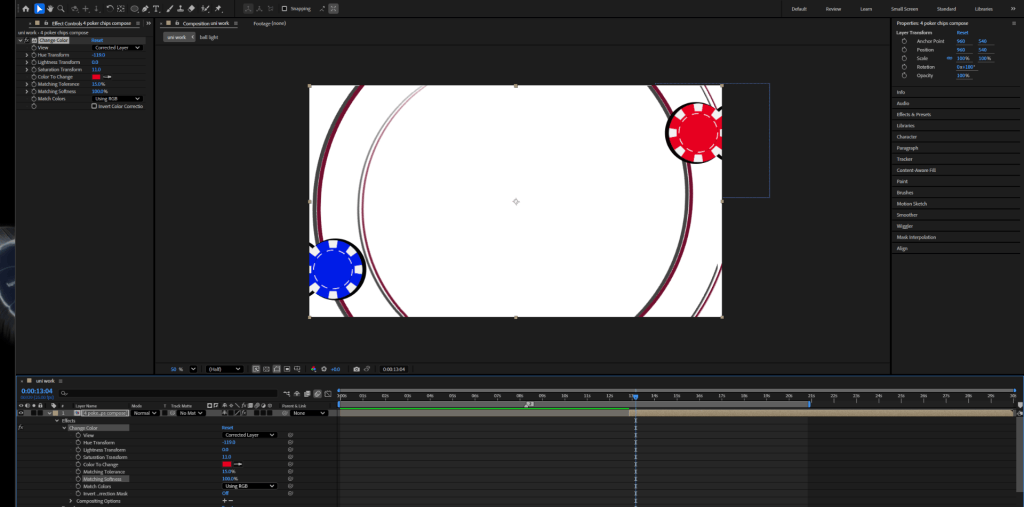
Above is some documentation of the steps I took to create my James bond intro. Much of the work revolved around shape layers, masks and cleaning my green screen plates. Using both inspiration from former James bond intros and a lot of creative freedom I created. Poker chips, blood slatter that morphs into a transition for the next scene. I used effects such as colour change to lessen the need to create more poker chips before pre composing them. Used many different types of stock footage and changing blending options the change the effect given on other layers. I found it very fun tampering with glow effects changing the colour grade of the lights.
Overall I had a lot of fun creating this piece.
FINAL INTRO JAMES BOND:
week 6: Tracking
in todays lesson we had a look at tracking different types of things within a scene. for example we looked at tracking the faces of a boy playing football, a mountain and people walking through a shopping mall.
WEEK 7
in this weeks lesson we continued to look at the tracking tools within after effects and also began to look into the generative fill that can be used to replace things within the scene.
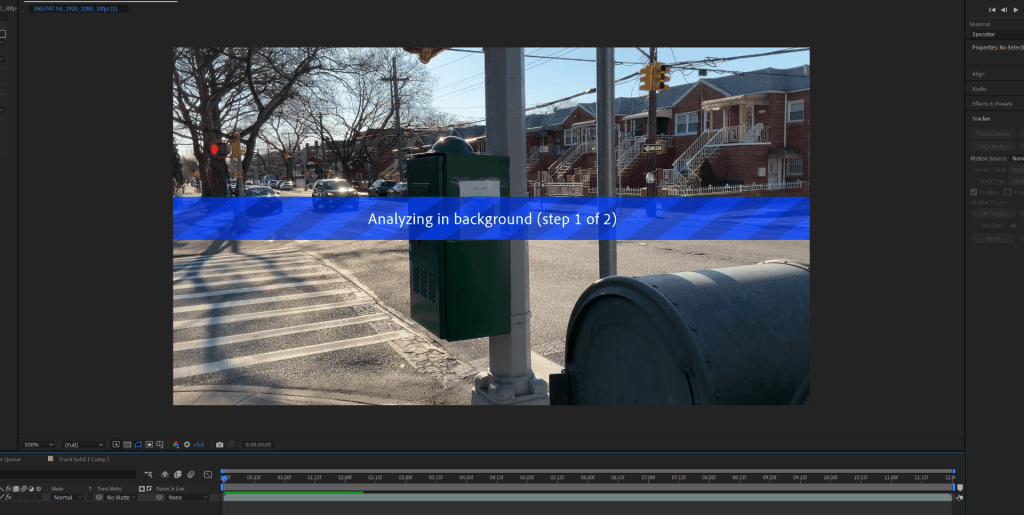
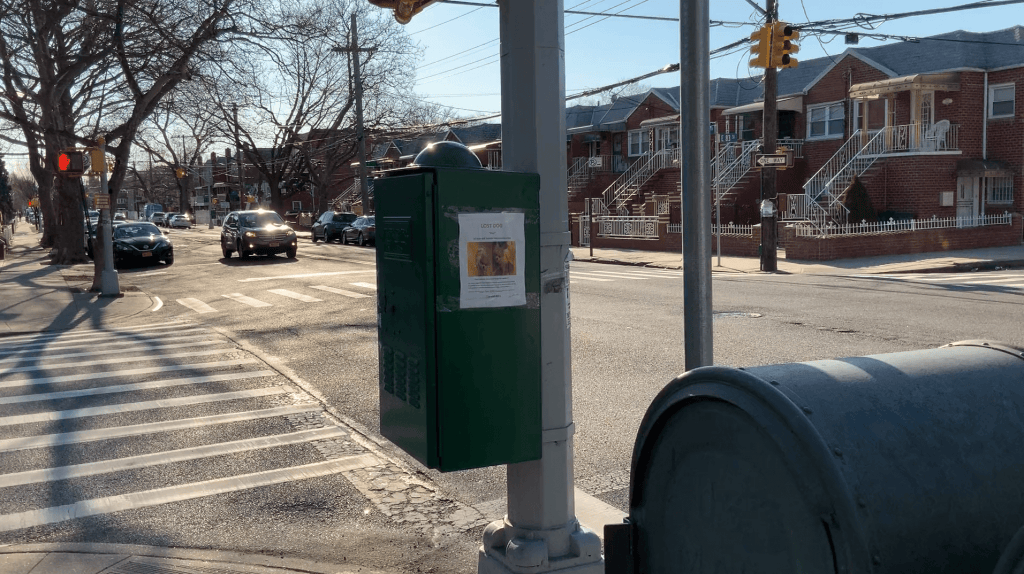
Above is my attempt at creating a poster that looks like it belongs in the scene. I used the 3d tracking to place my poster and just saturation effects to make it appear more realistic.
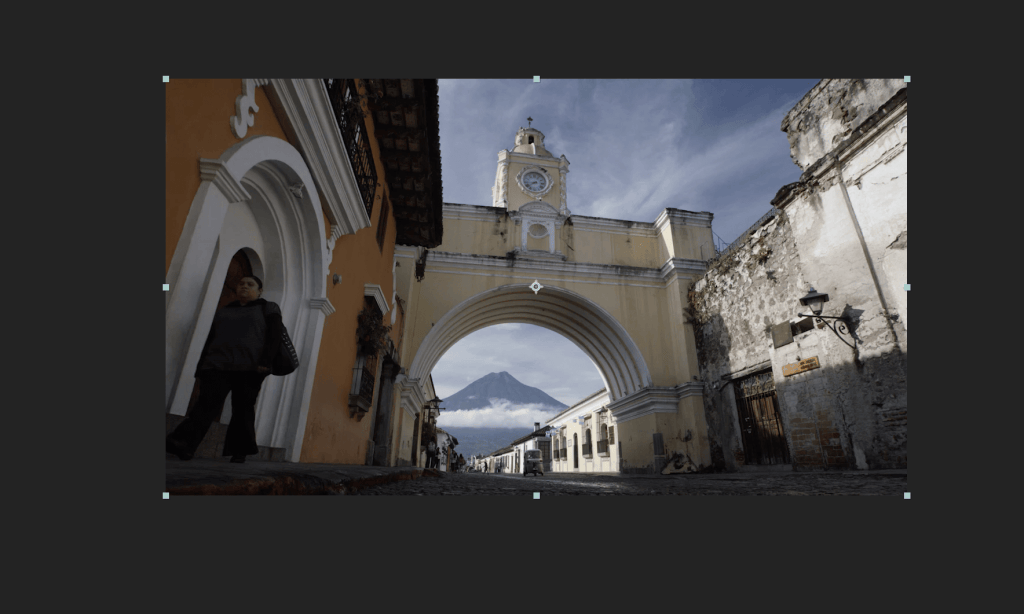
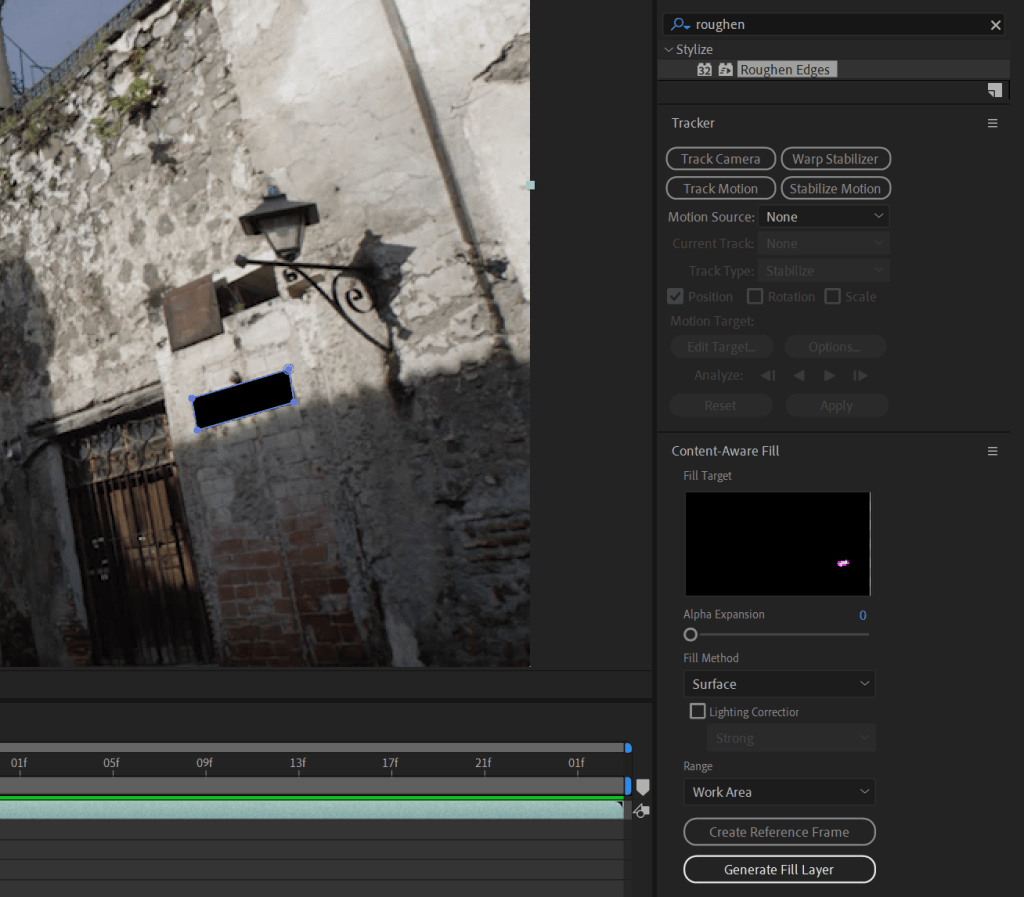
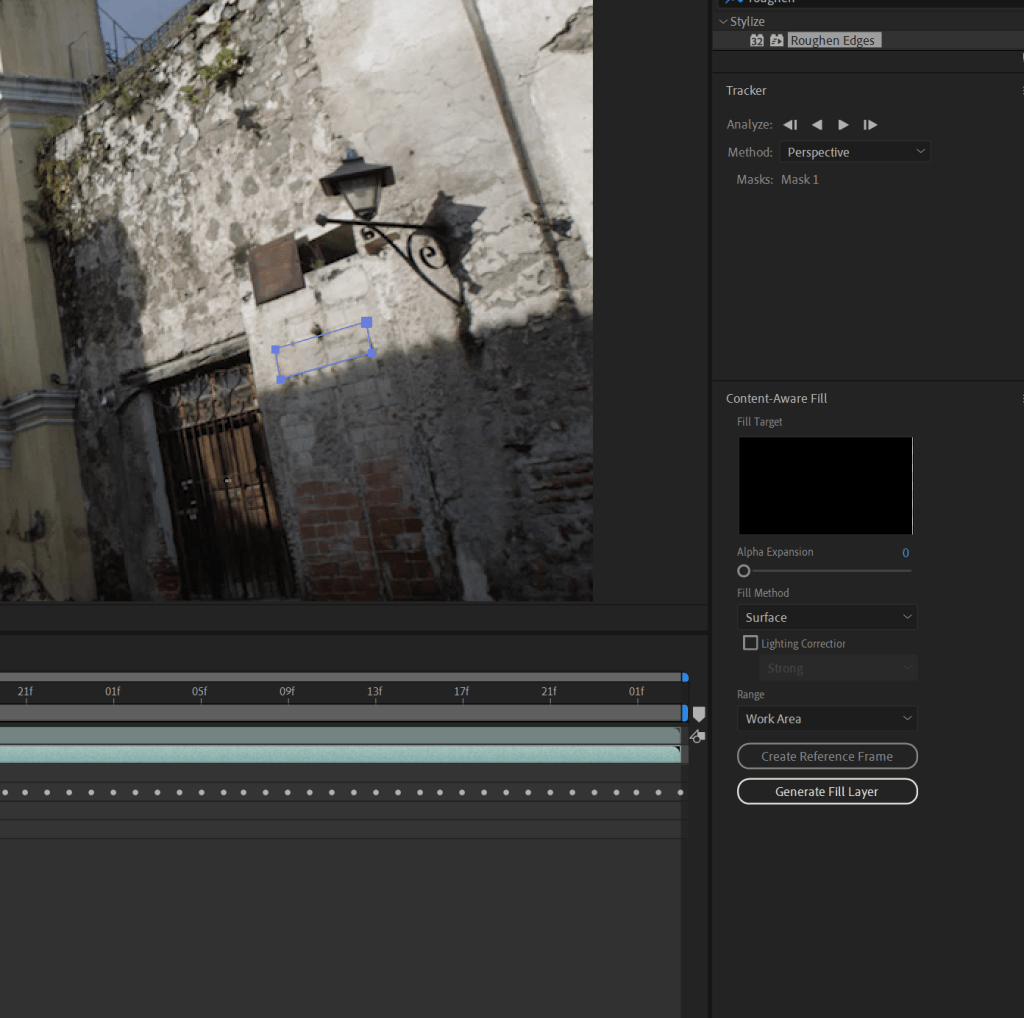
Above i am using a ai tool that allows us to mask out part of an object, wall or item and then generate a fill layer based on what is detected in the scene. this when down right can further enhance masking and covering capabilities.
The rest of the lesson was spent experimenting and seeing what else we could give a realistic replacement/change within the scene without it being veryobvious.
ASSIGNMENT 1: SHOWREEL
week 8: 3D spaces
In this lesson we took a deep dive into look at 3d spaces and how we can use them to simulate depth within our projects.
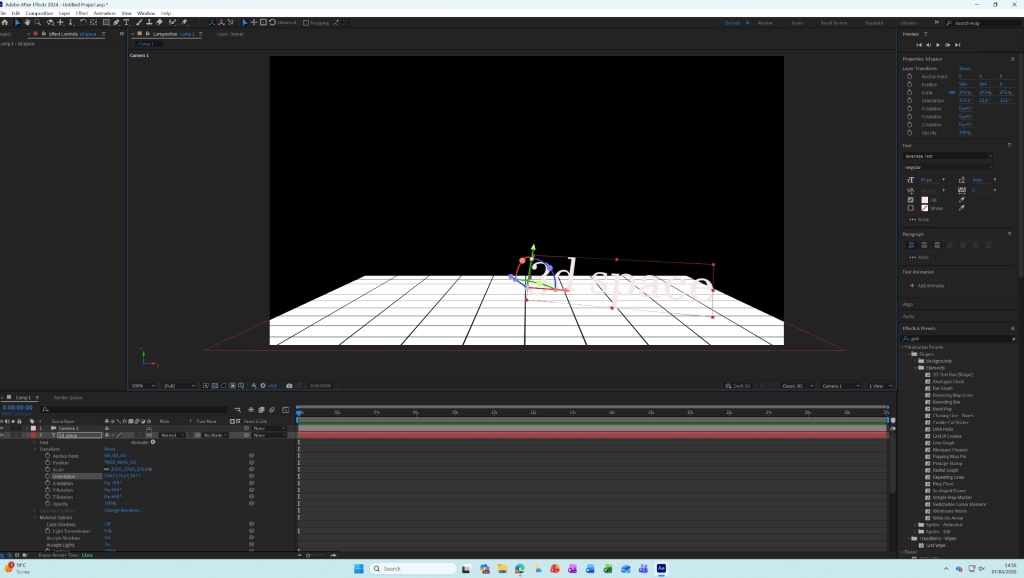
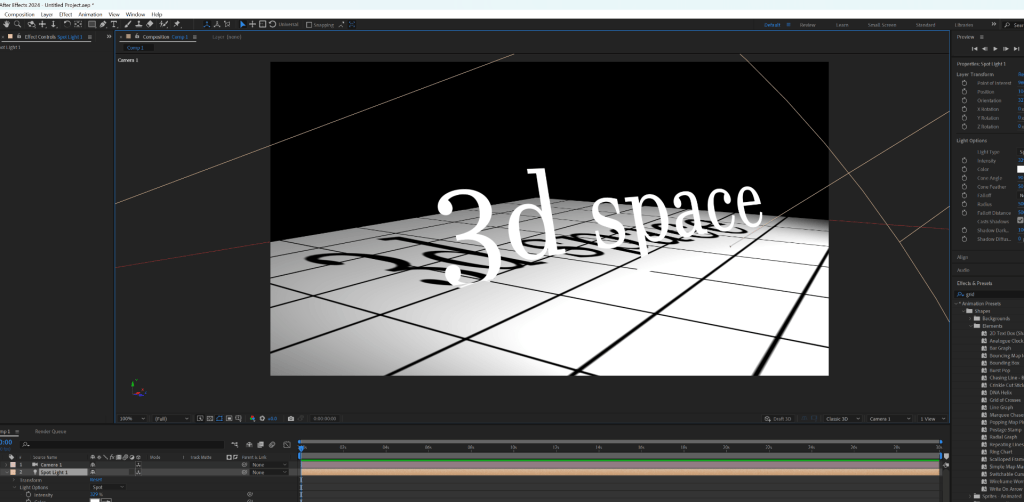
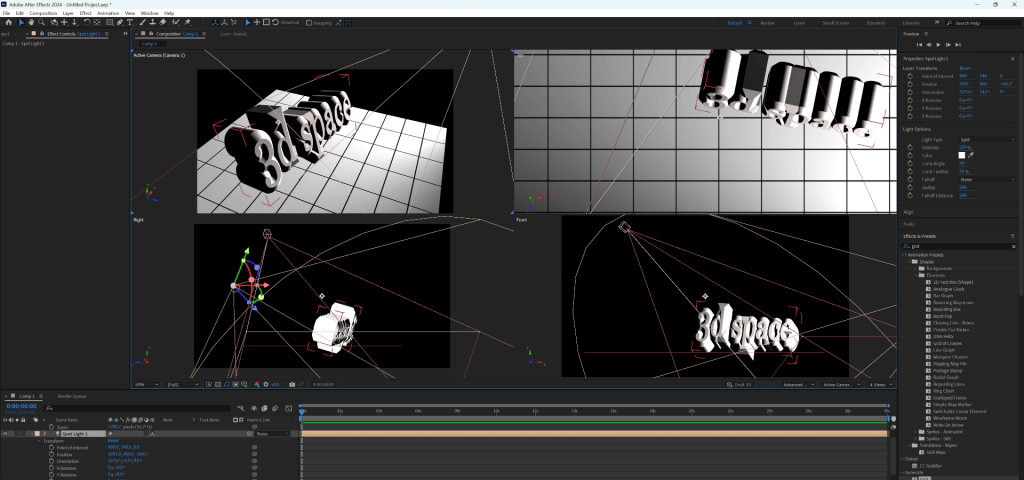
Above is me creating a grip so that I can see and navigate my 3d space and then me creating text that then drops a shadow from my spot light
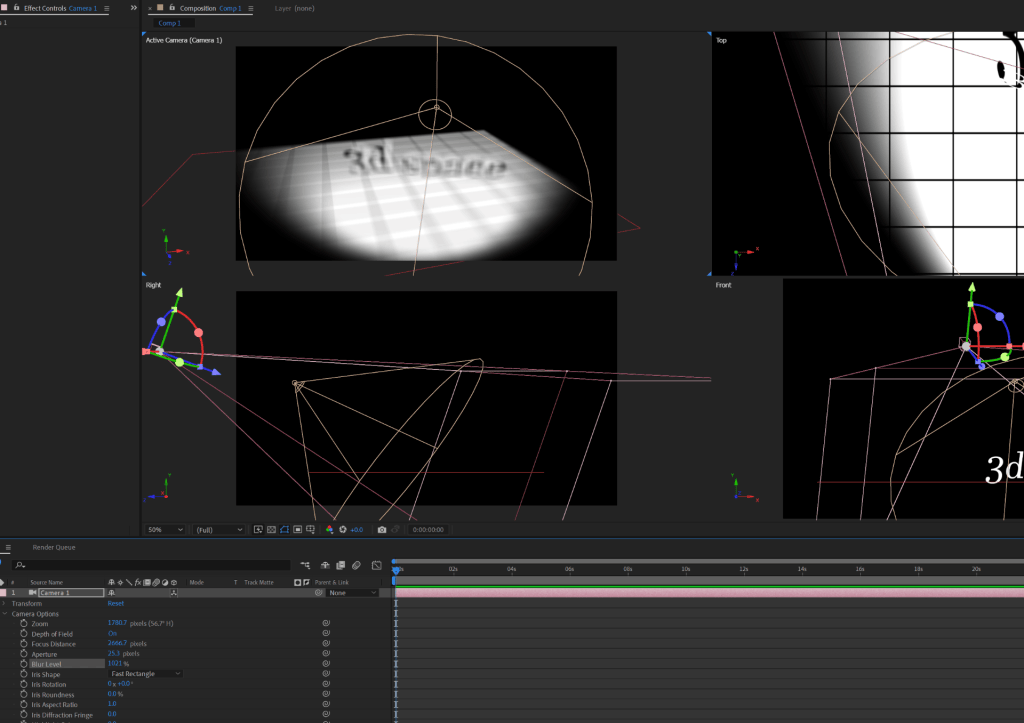
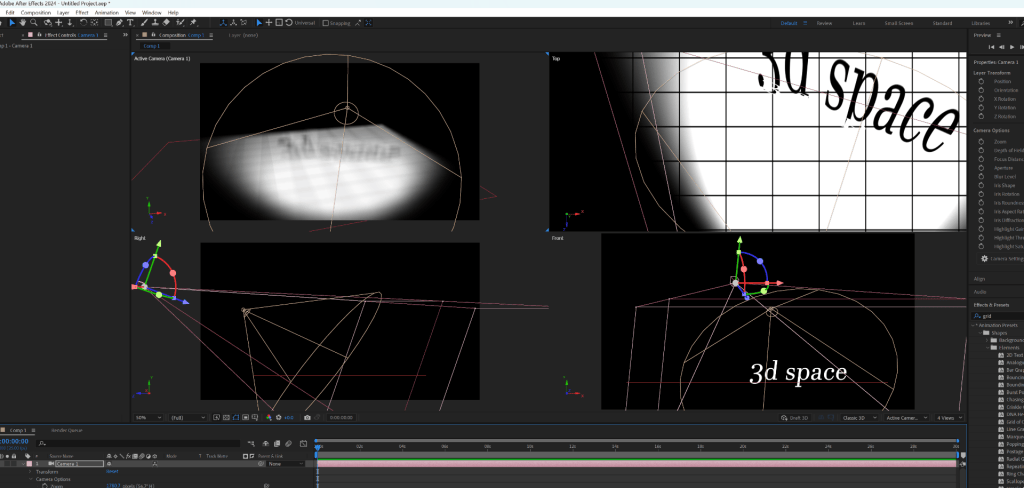
After creating my 3d space, light source and another camera layer i played around with the depth of field, blur and aperture.
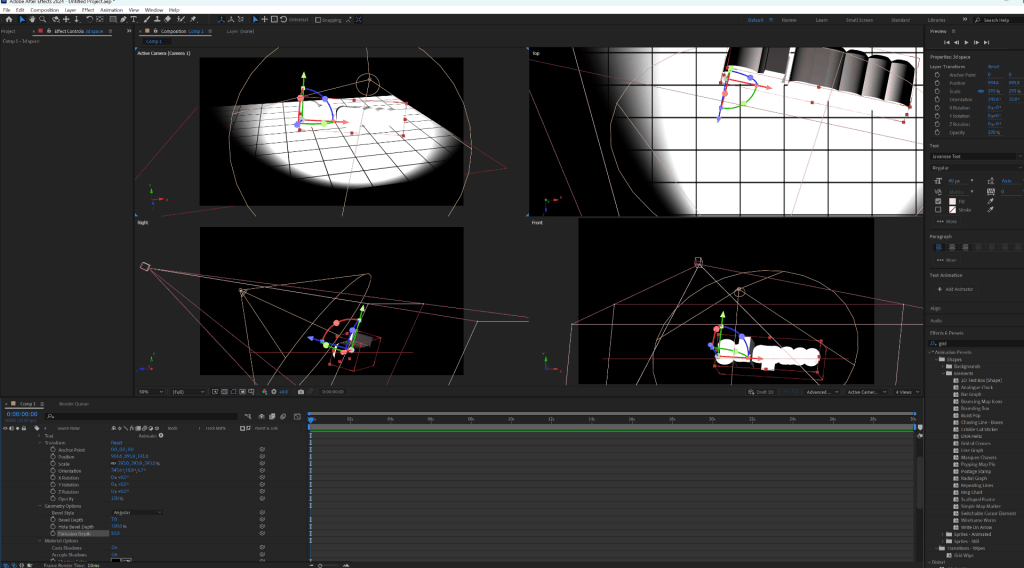
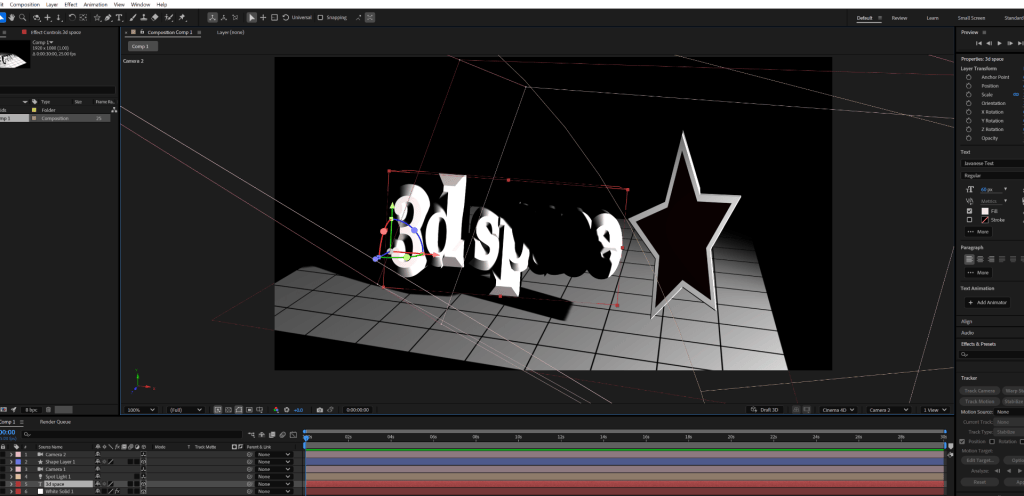
To finish I extruded my text and added a bevel as well as adding a shape layer which I also extruded and then began to apply effects and animate them.
I also completed another task where we looked at the shattering effects on the 3d text
RENDERED FINALS
week 9:
Maya Render Passes, AOVs, EXR export and compositing these elements in After Effects
in todays lesson used maya in order to create zdepth which can then be imported into after effects to to give better visuals and 3d depth much more in the post processing stage that can fix mistakes or make adjustments.
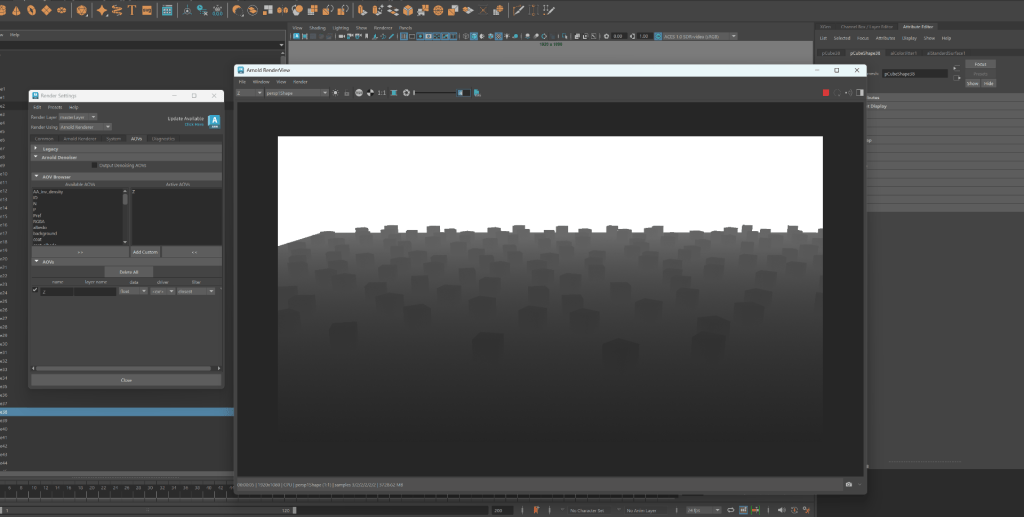
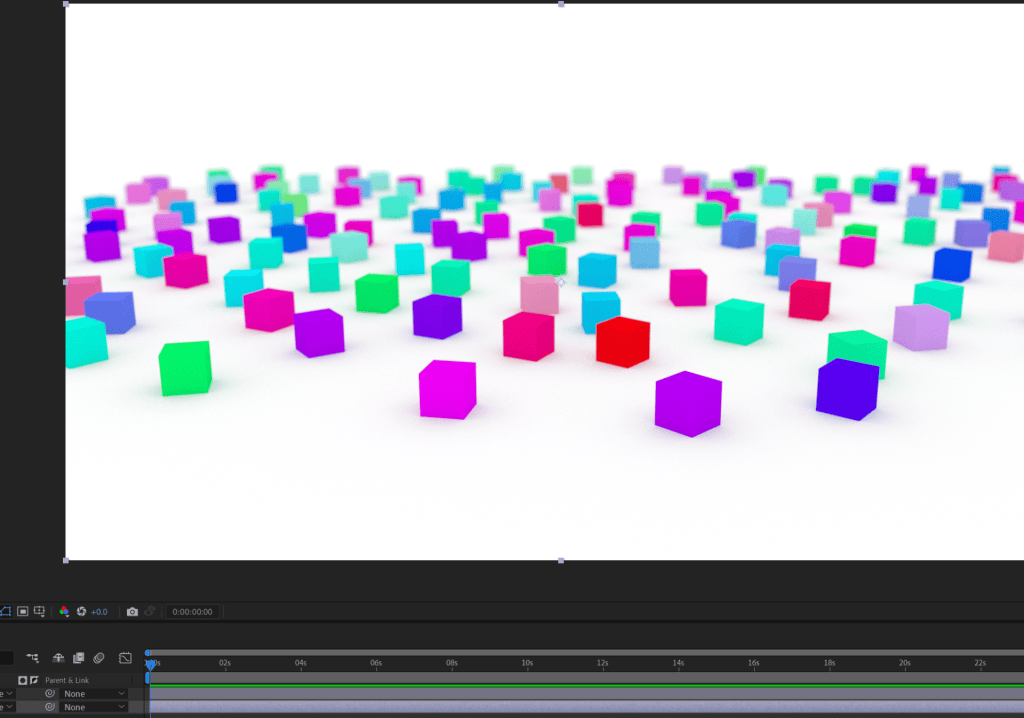
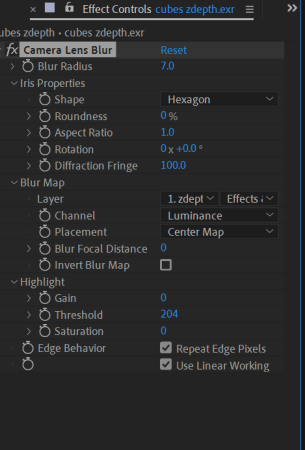
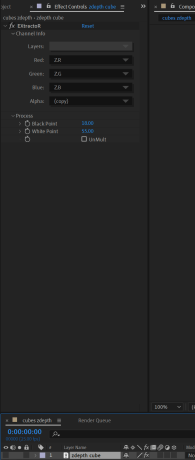
By adding the camera blur lens effect and the extractor, i am able to blur the image to simulate depth in the scene and manipulate the focal distance to control the appearance to the viewer.
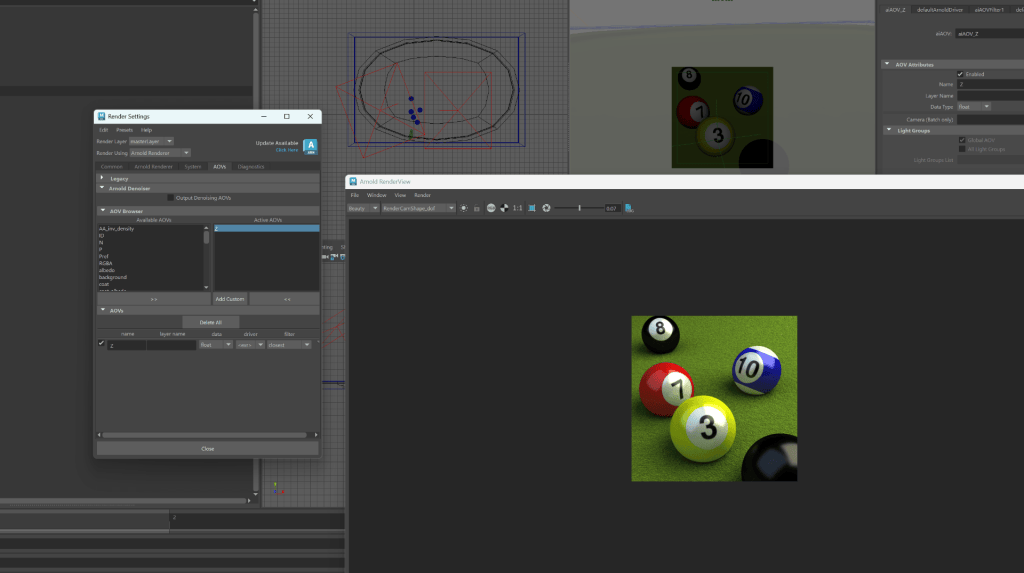
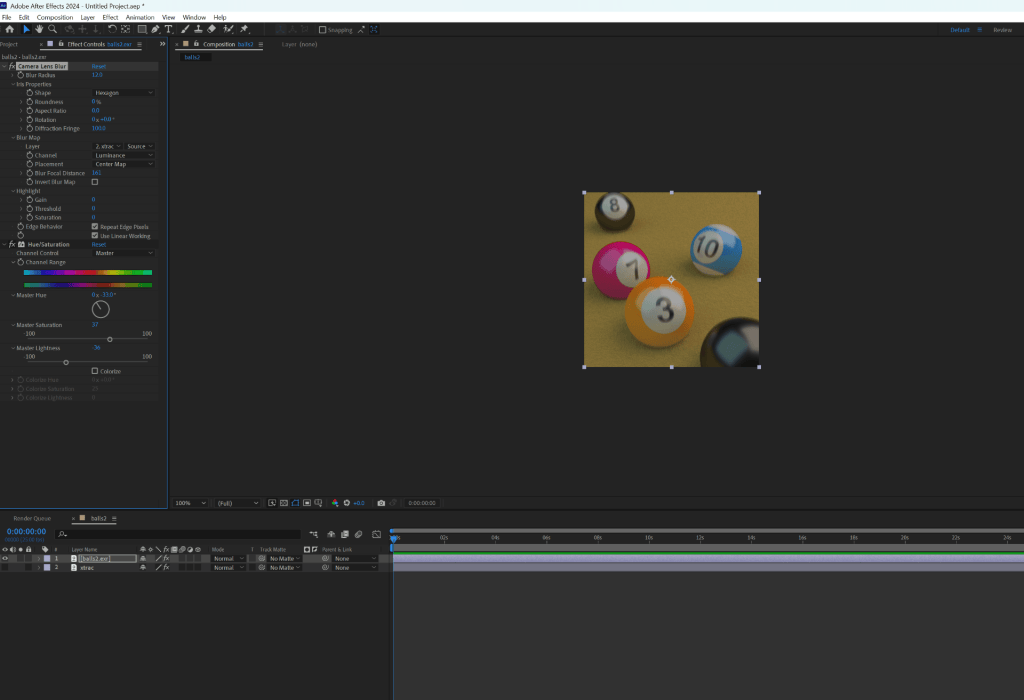
Above i have done the same thing however i have added hue and saturation to further manipulate the scene and colour correct to give a more realistic view.
Adding ambient occlusion
ambient occulsion is a shading technique that simulates how light moves in real life. In maya we can seperately render the ao pass which i can export and import it into after effects using the extractor tool. This tool lets us pull out specific channels from our renders.
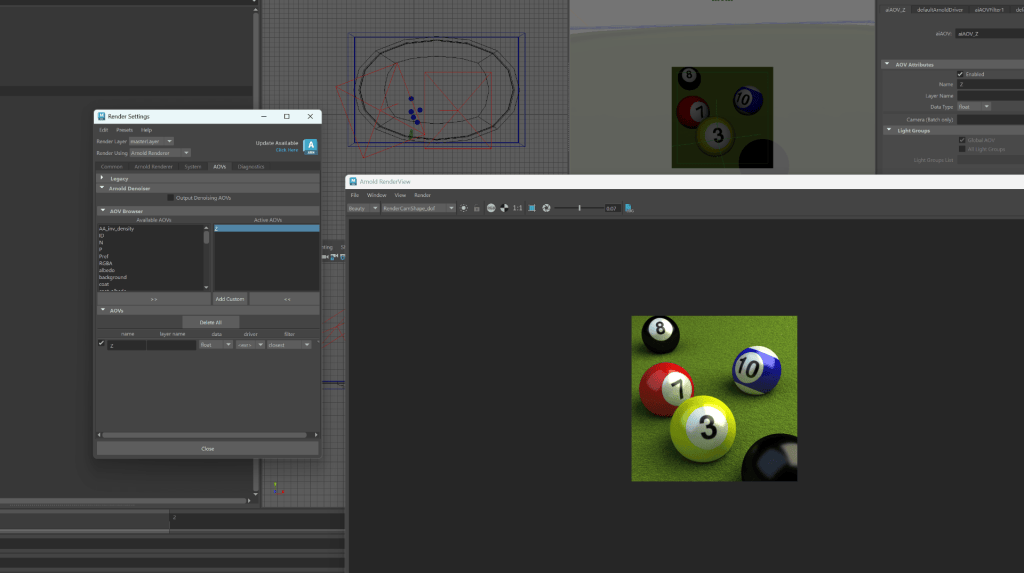
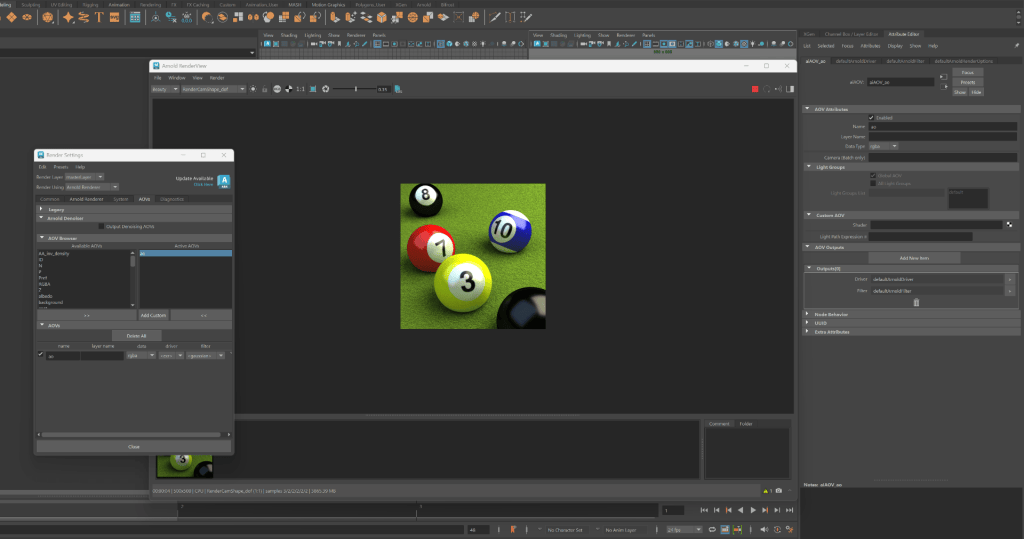
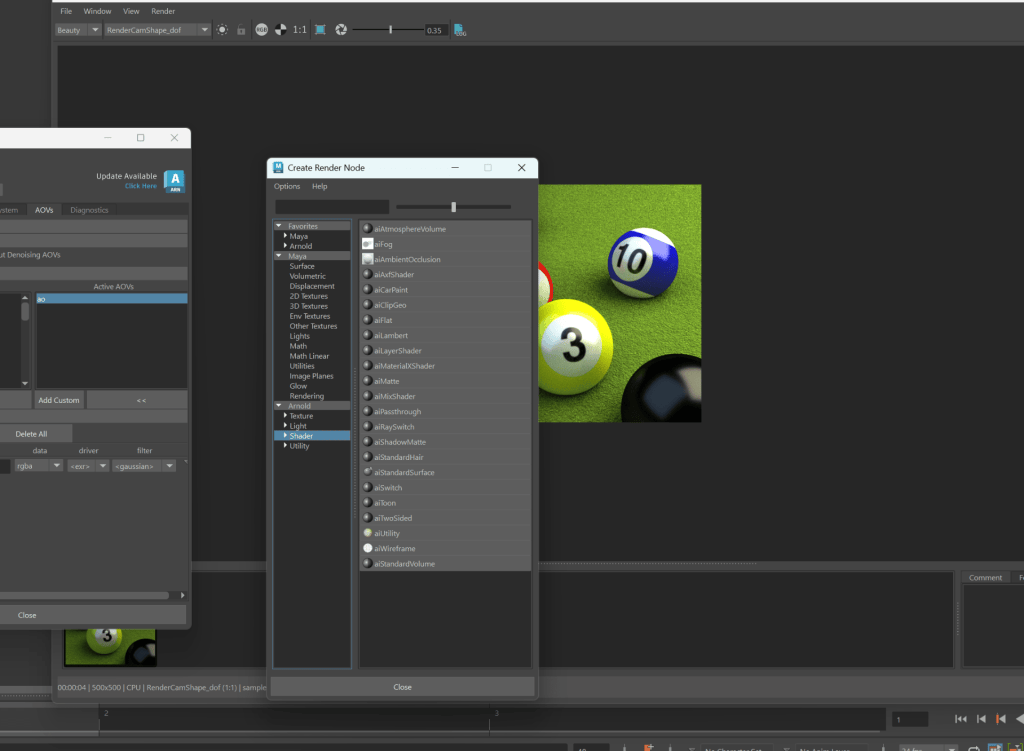
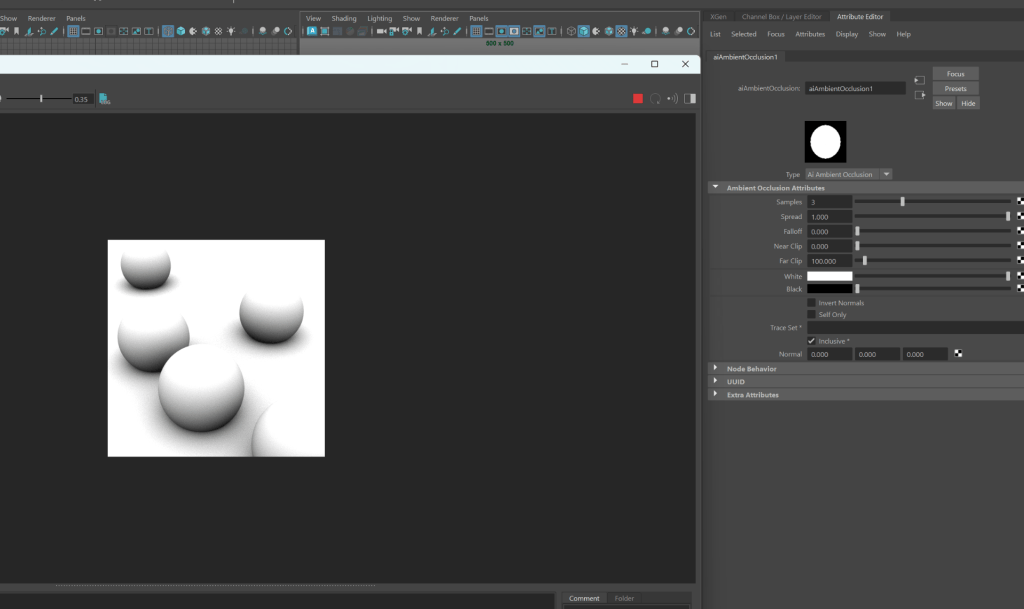
Above is the methodology to adding ambient occlusion, we can add our own aov which can then be allowed to add a type of shader. the shader we add is an ai ambient occlusion.
week 10: Render Passes Test Setup
render passes different layers of our render broken up, such as, lighting, shadows and reflections that can be tweaked in after effects.
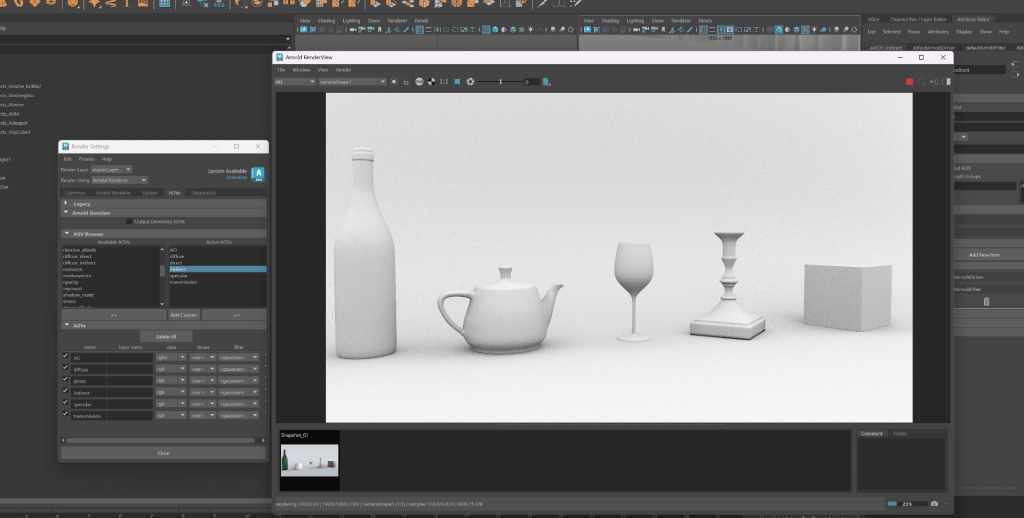
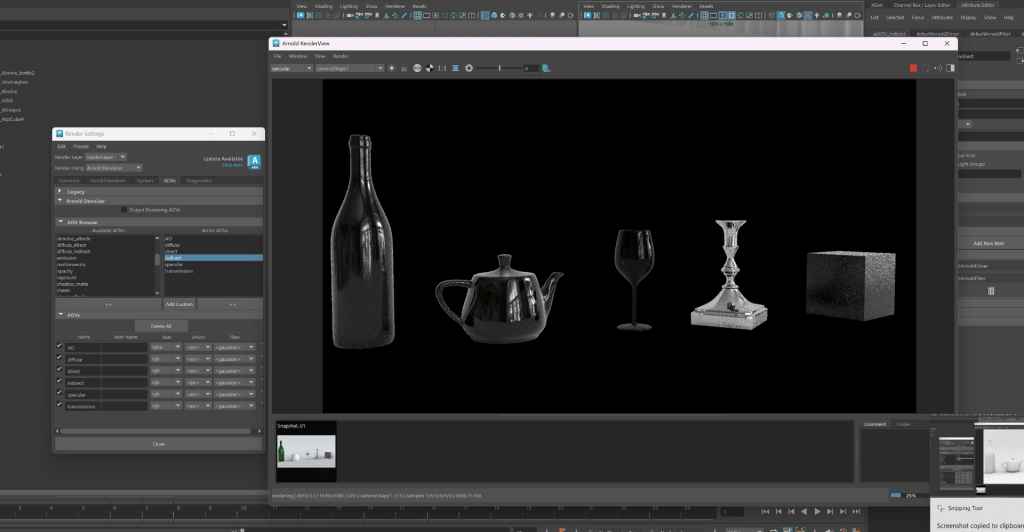
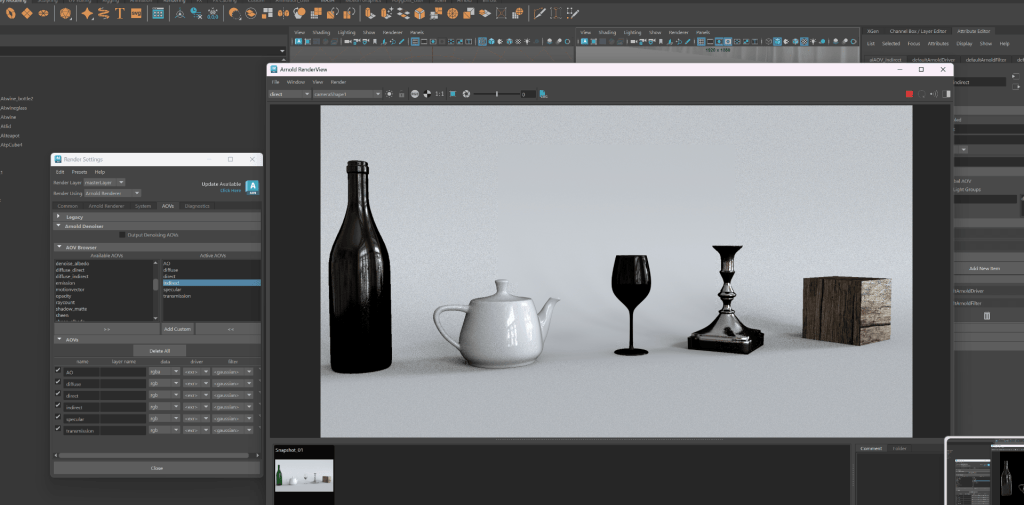 An easy way to test the render passes is to rebuilt the image with exact render and get back to the original image. we use blend modes like Normal, add, screen and multiply. If these are done correctly the stacked renders will be the same as the original render.
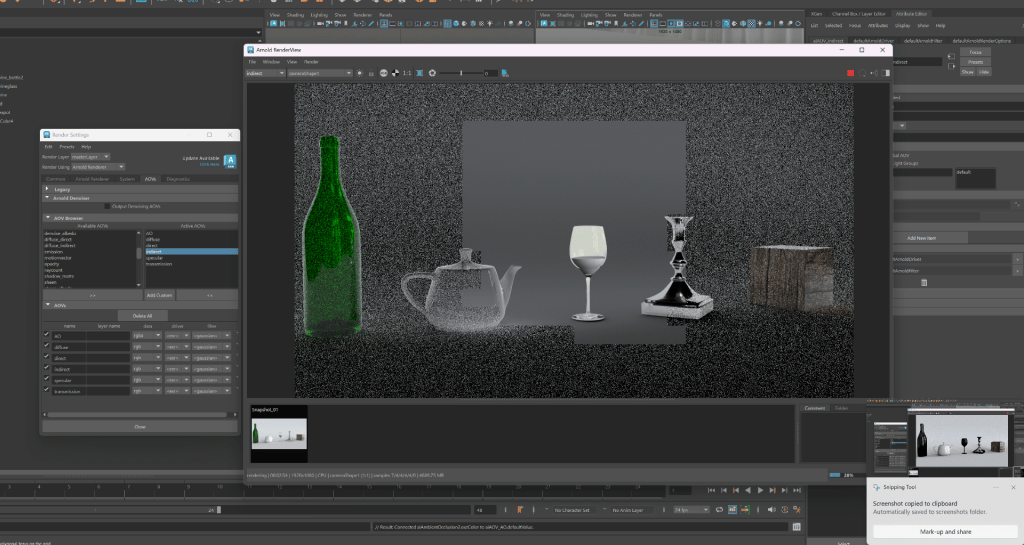
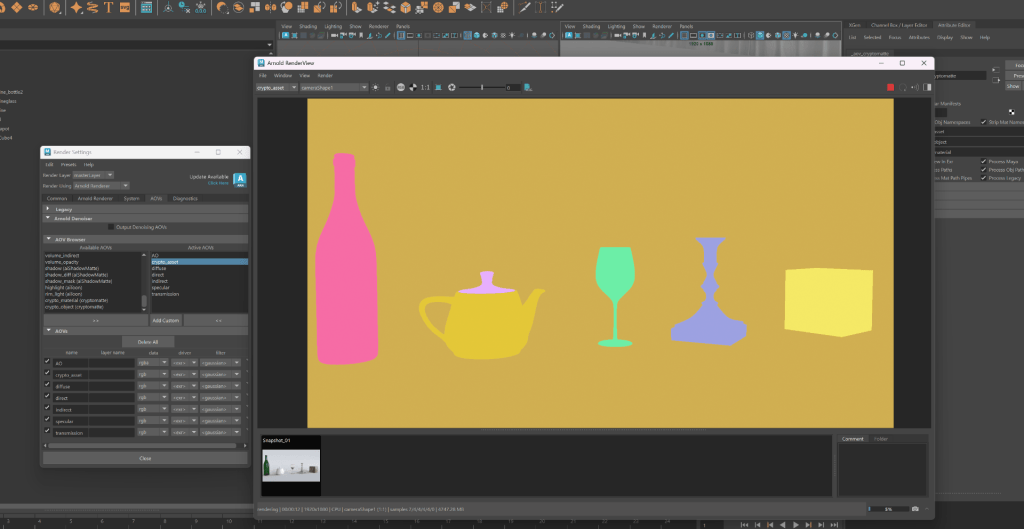
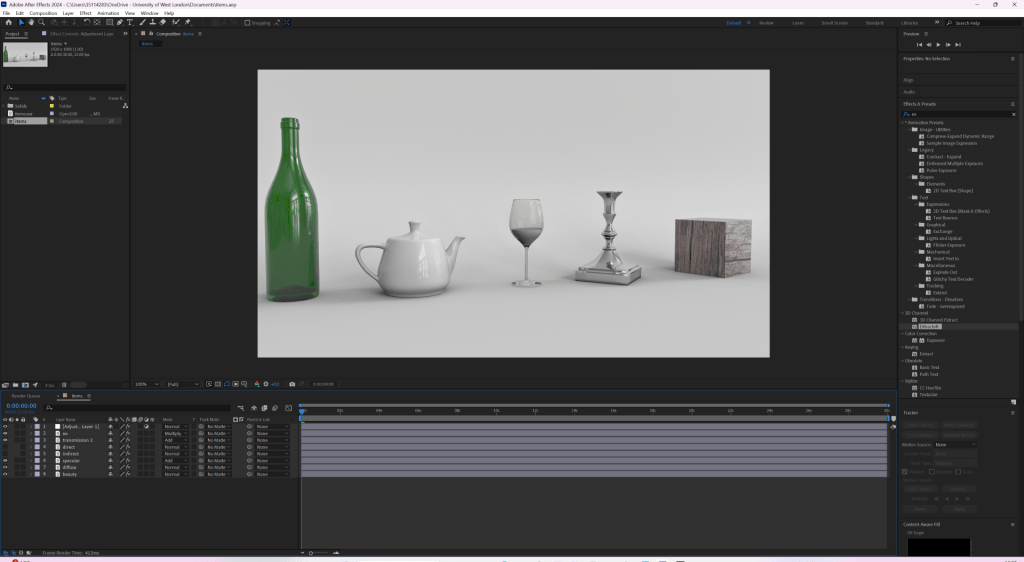
In todays lesson we looked at render passes and aovs and crypto. Using these different renders from maya and applying them with an extractor effect in after effects we are able to control the look, depth, shade and lighting to a higher extent.
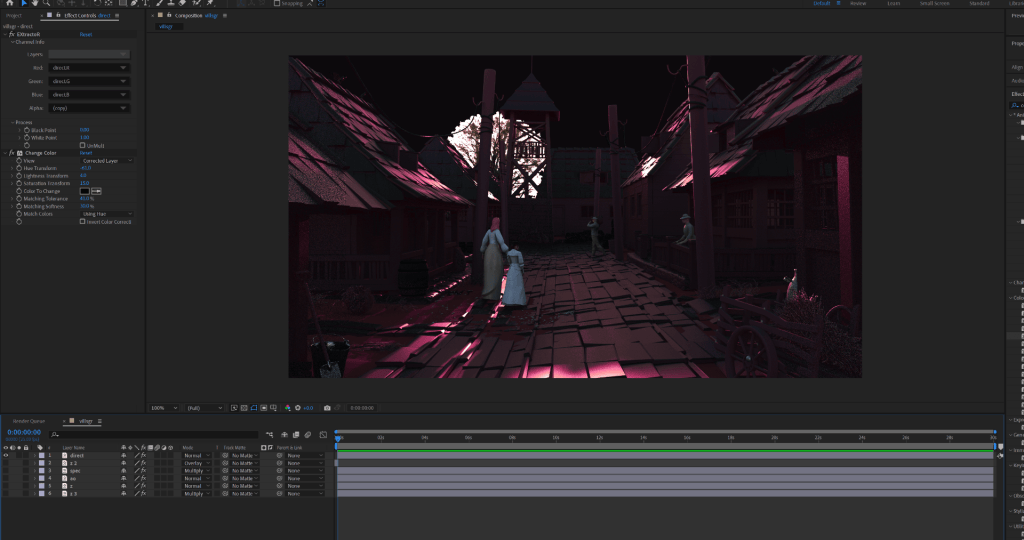
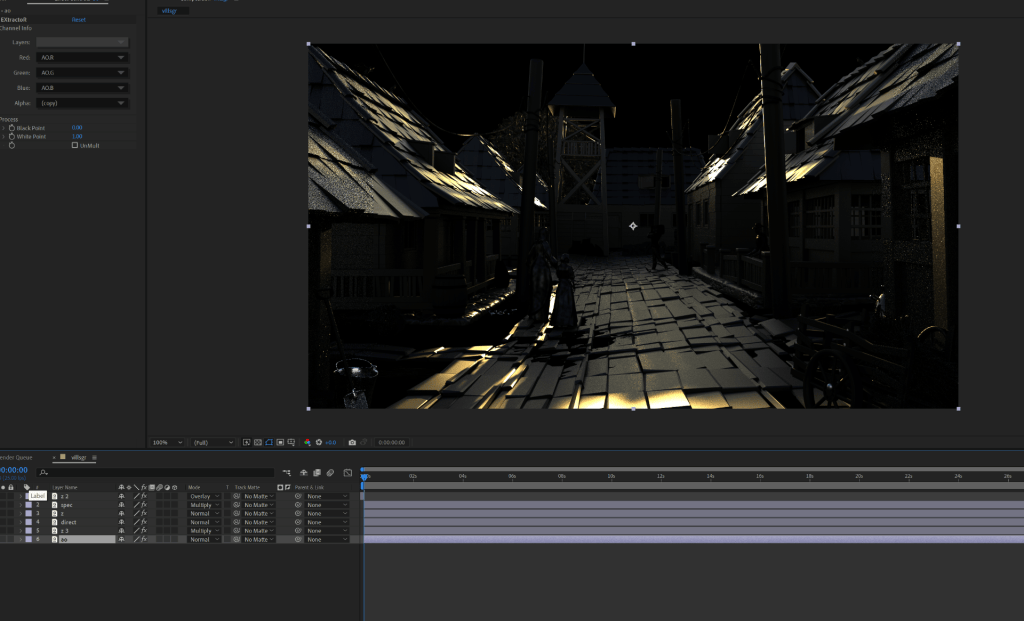
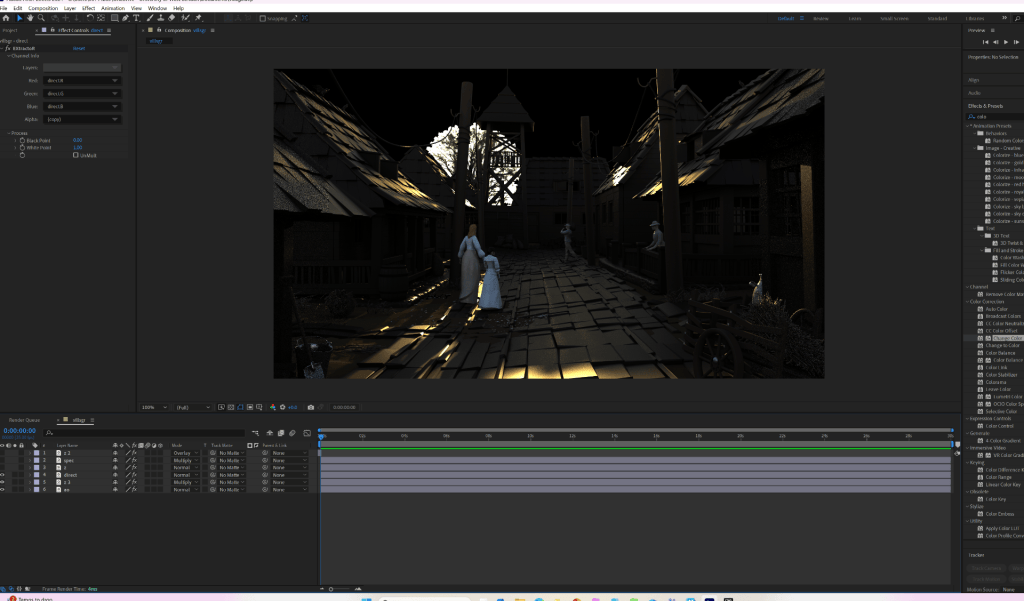
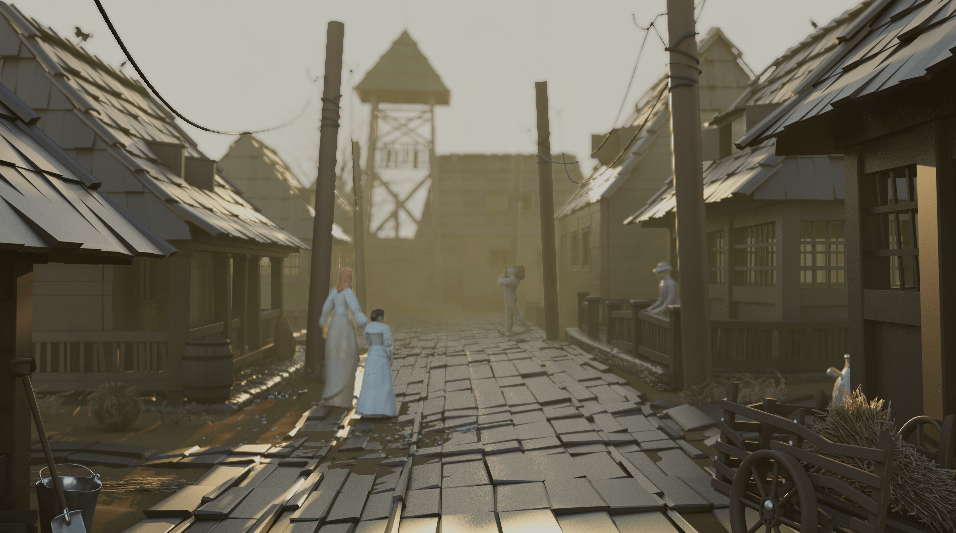
Above i am using the same techniques I’ve be taught in order to build up the lighting, shading and z-depth within the scene. Doing this allows me to see problems without going back to the render. for example if the shadows are too strong you can by itself instead of waiting for another render which can help with time management.
Week 11: Introduction to Dynamics in Maya
In todays lesson we are doing a introduction to rigid body dynamics, were looking at animating objects and how we can make different objects interact with each other by applying a bullet plug in rather than key frame animating their movement which may be inaccurate or unrealistic.
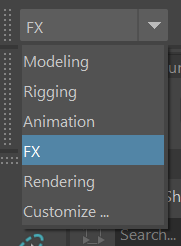
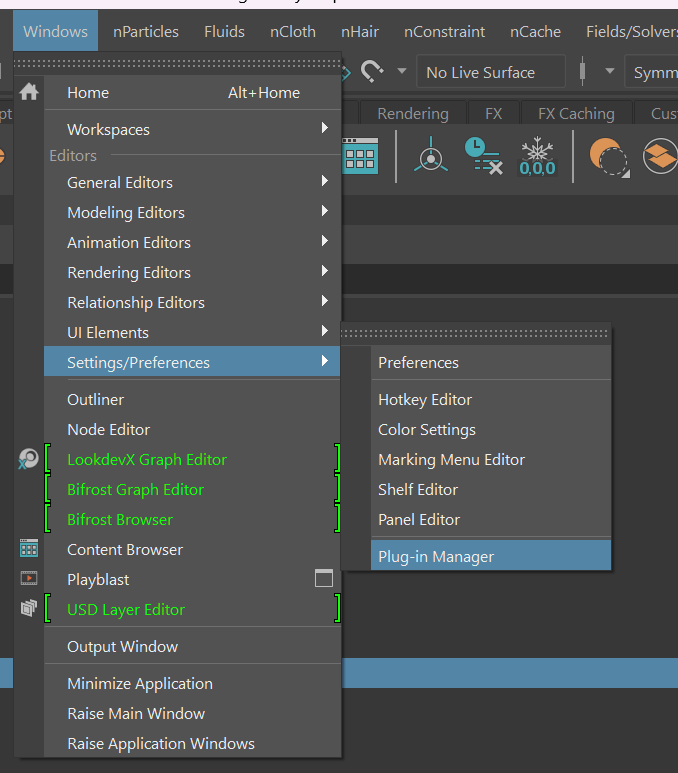
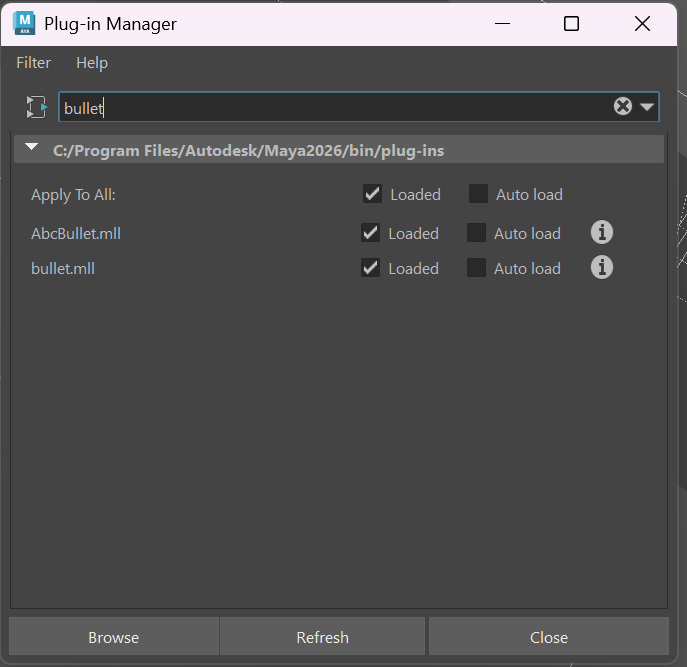
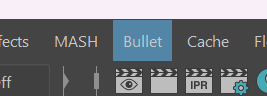
Above is the steps i used to get into the FX part of maya and how i was able to active the bullet plug in due to it not already being available in my dock. Once available i was able to apply it to different objects.
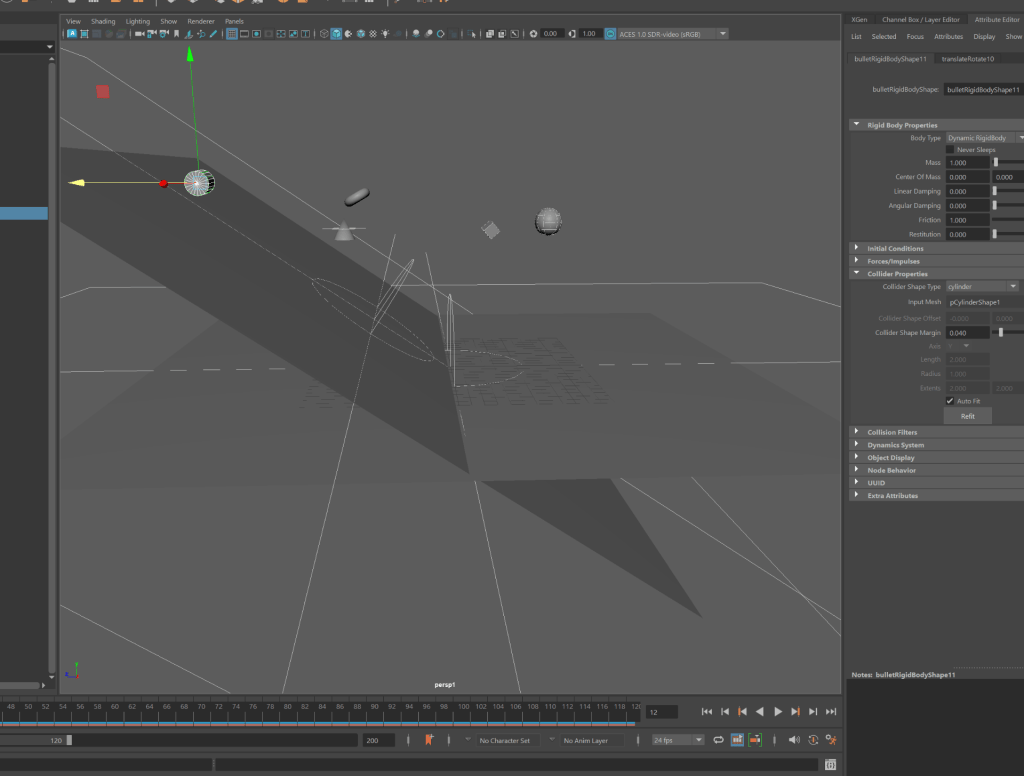
For example, I created a plane and then applied the passive rigid body and set it to plane.
I then created some objects and applied different with the active rigid body with correct collider shape type.
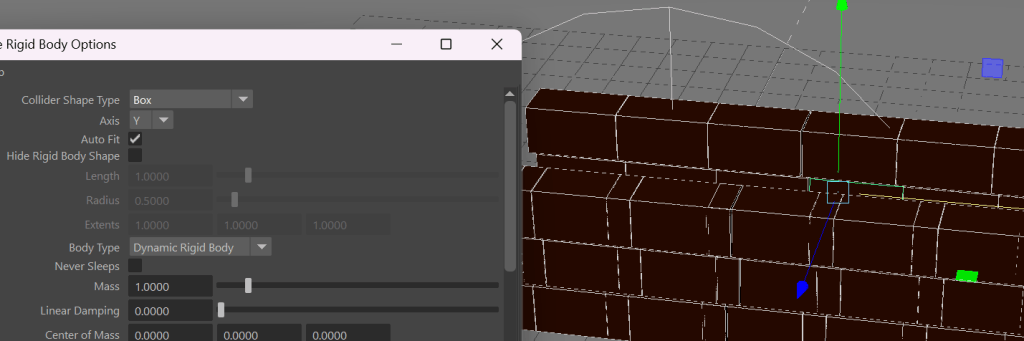
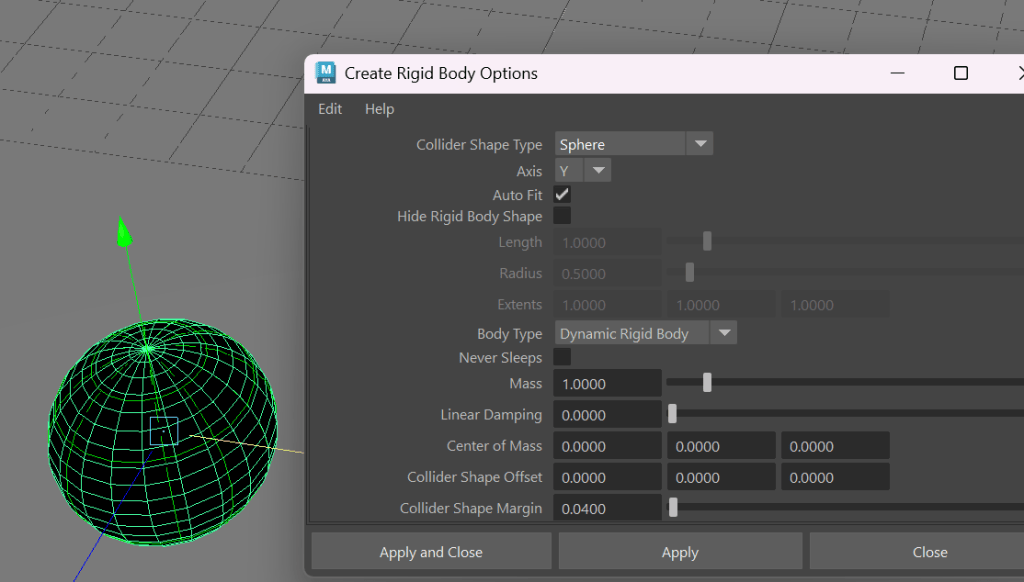
After applying these i clicked apply and they were locked in. From there i was able to make them collide with each other.
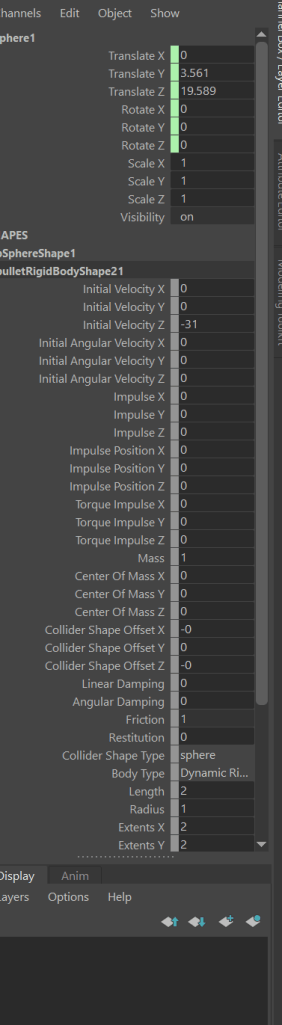
By applying force by changing the z initial velocity to -31 (my brick were behind instead of in front) i was able to shoot the ball at the bricks making them collide and break apart. 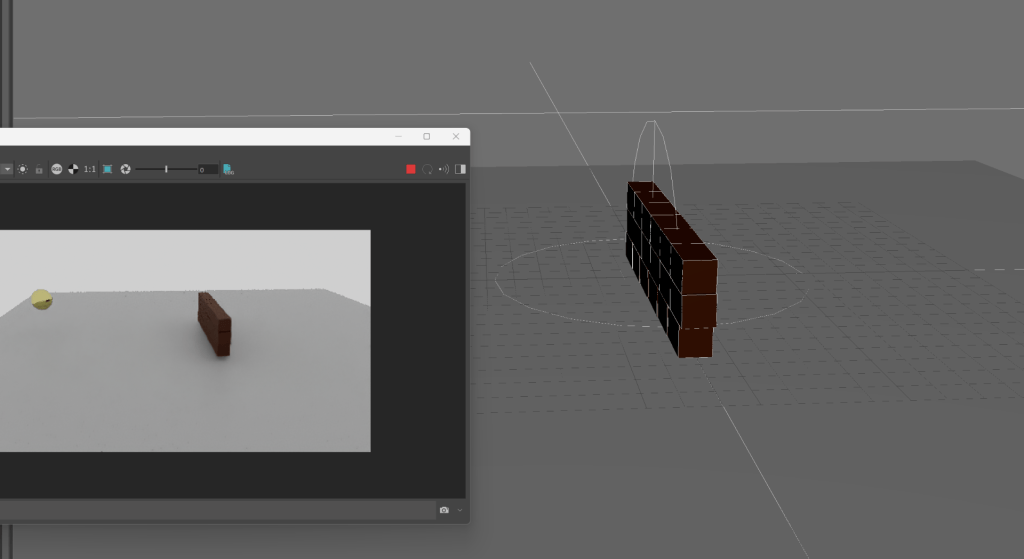
week 12: continuing dynamics
In todays lesson we are continuing the exploration of dynamics, to begin with we looked at how we can apply effects to our objects such as shatter to make or objects explode and break apart.
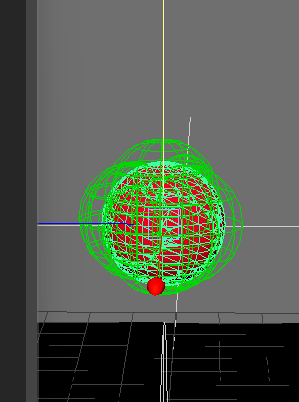
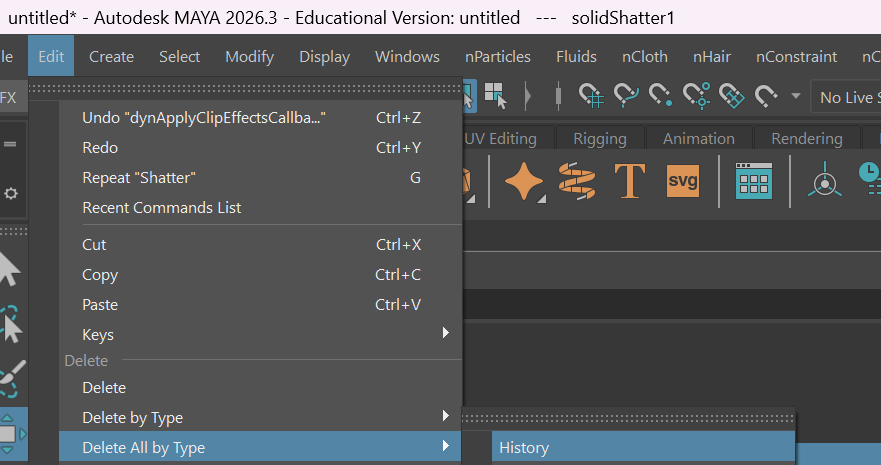 Starting off we add a sphere and delete the history of the object to clear any nodes or things we do not want in the object.
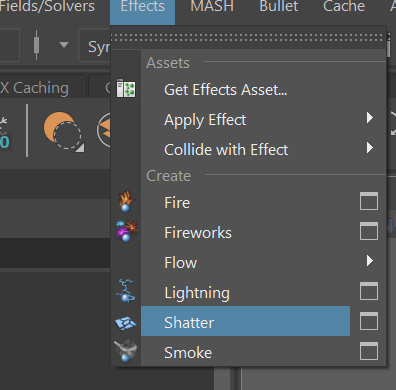
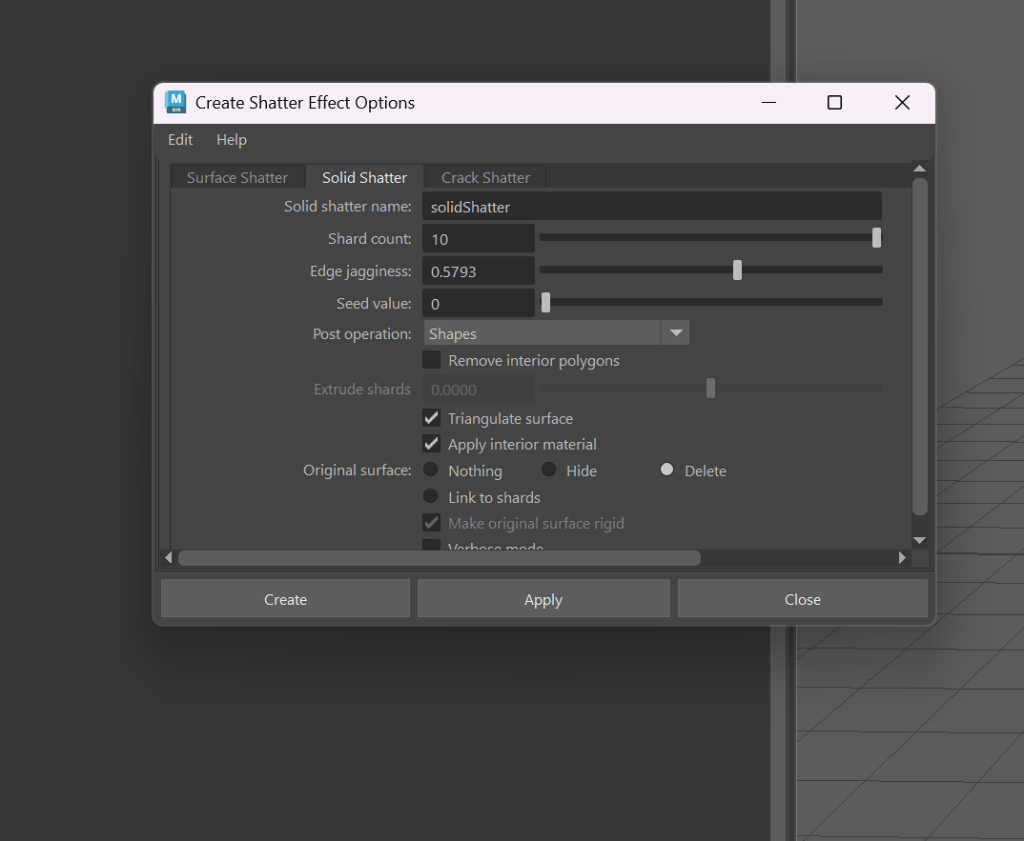 Next we apply the shatter effect and change the shard count to give us more broken pieces and adjusting the edge jagginess to make it look sharper and more realistic.
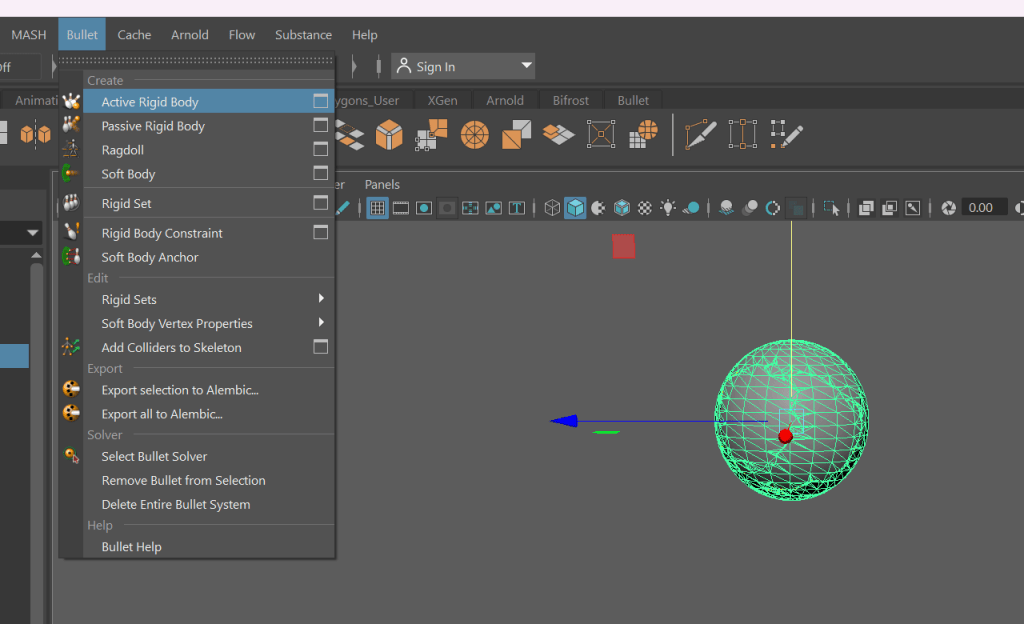
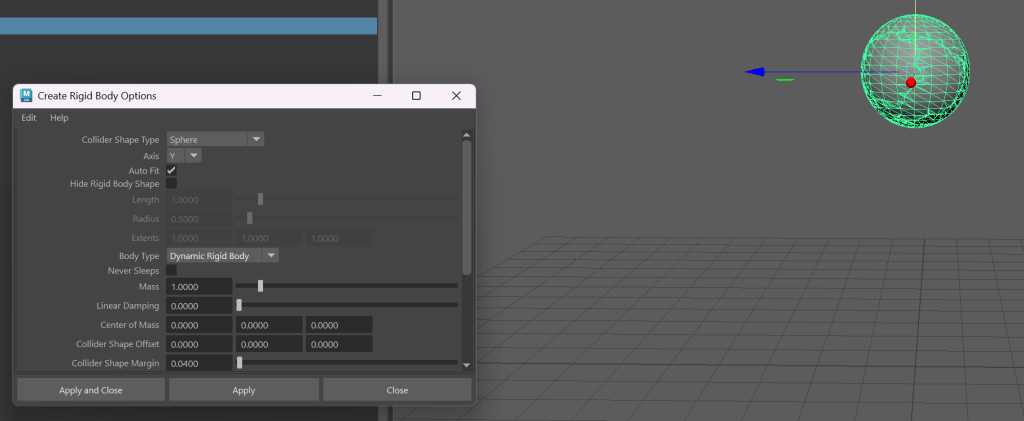 from here we make the ball and all its pieces a active rigid body and select the sphere to match the object we have in scene.
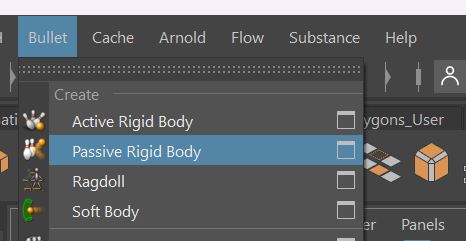
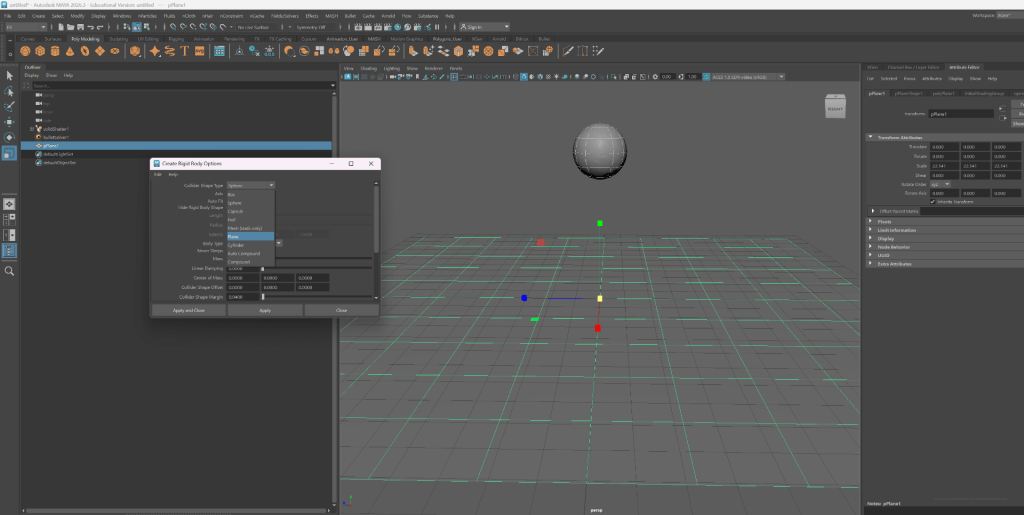
Next we take a plane so that the ball/sphere has something to land on and we give it an passive rigid and select the plane option.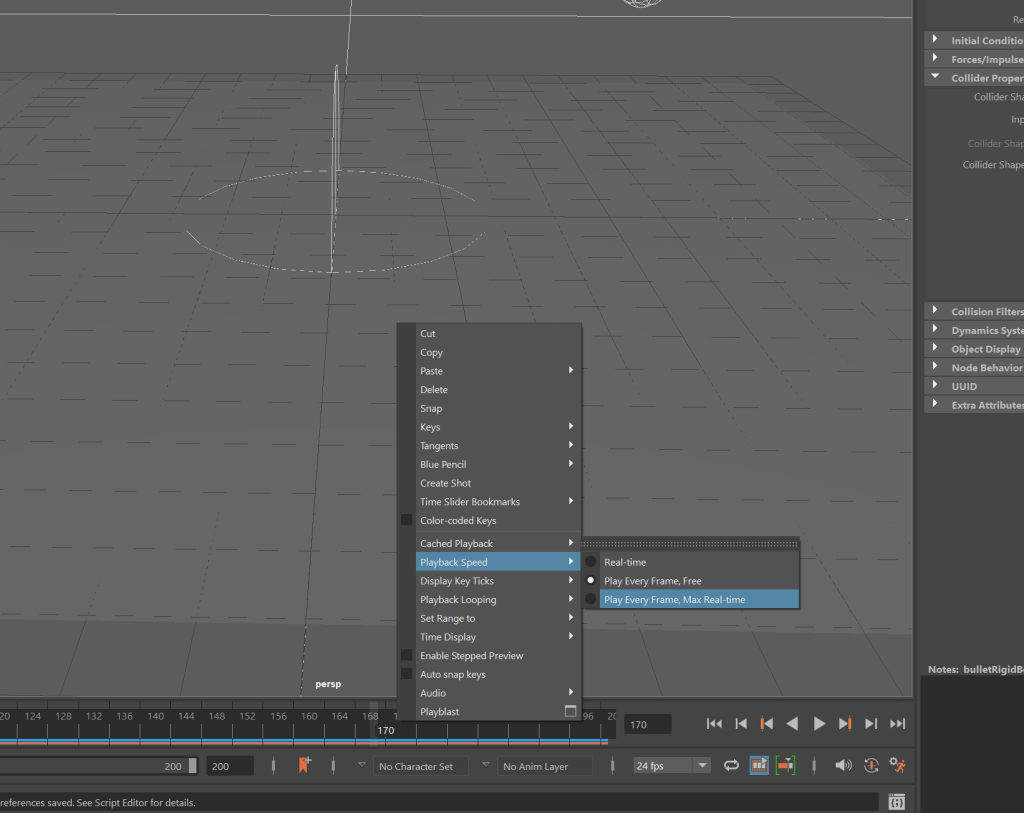 Finally so that you can watch it normally in real time rather than sped up you can right click on the time line and adjust the play back speed.
Exploding ball
JENGA:
For the Jenga i did everything as standard however i hand to make sure there were gaps so it didn’t explode on itself and also had the Jenga blocks drop from the sky.
Swinging chain
The method i used for this was slightly different as i used a torus/donut and extruded the vertex’s so that i could create a chain. i used the auto compound for the bullet active rigid body. I also turned of the mass in the attribute editor so that the chain would hang in the air and swing.. i added an ai standard surface which is gold and rendered it out.
Ncloth
To conclude the lesson we studied Ncloth and how we can use it to create tables cloth and flags for example.
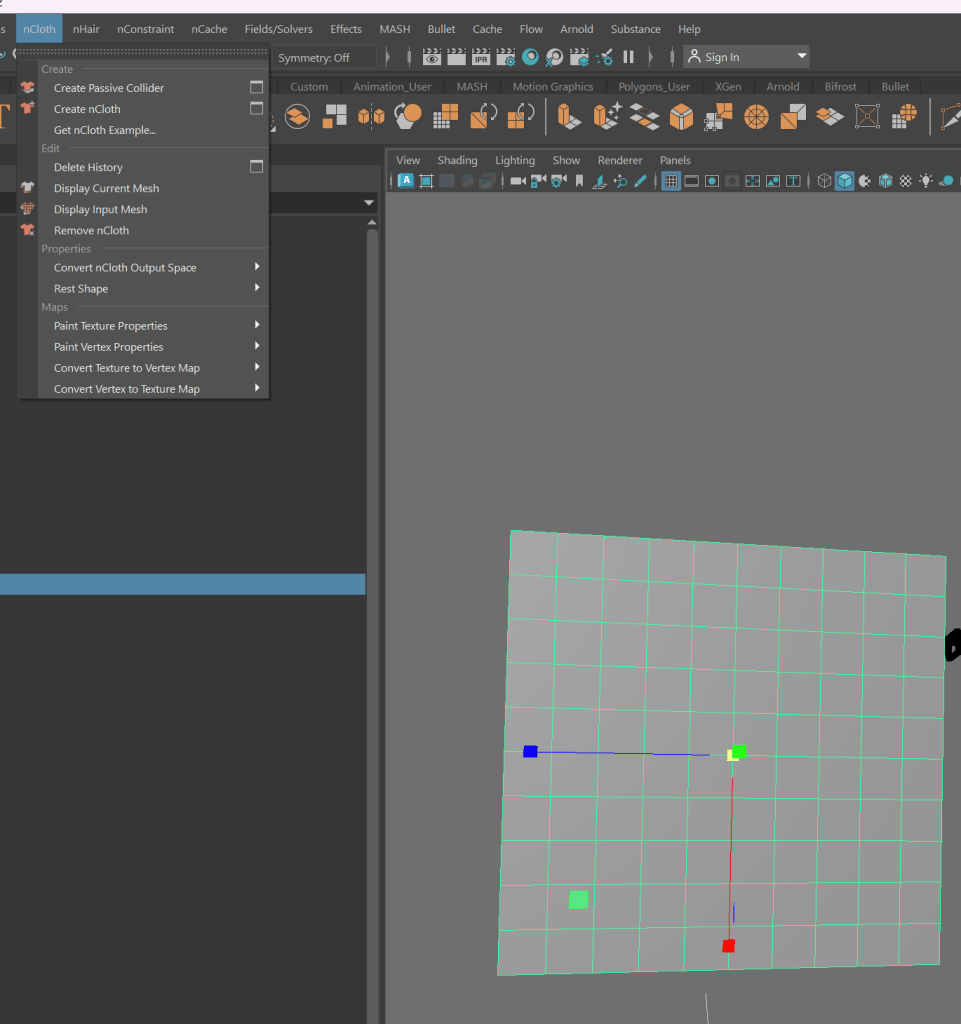 To begin we add plane and created a Ncloth and added more subdivisions to the plan
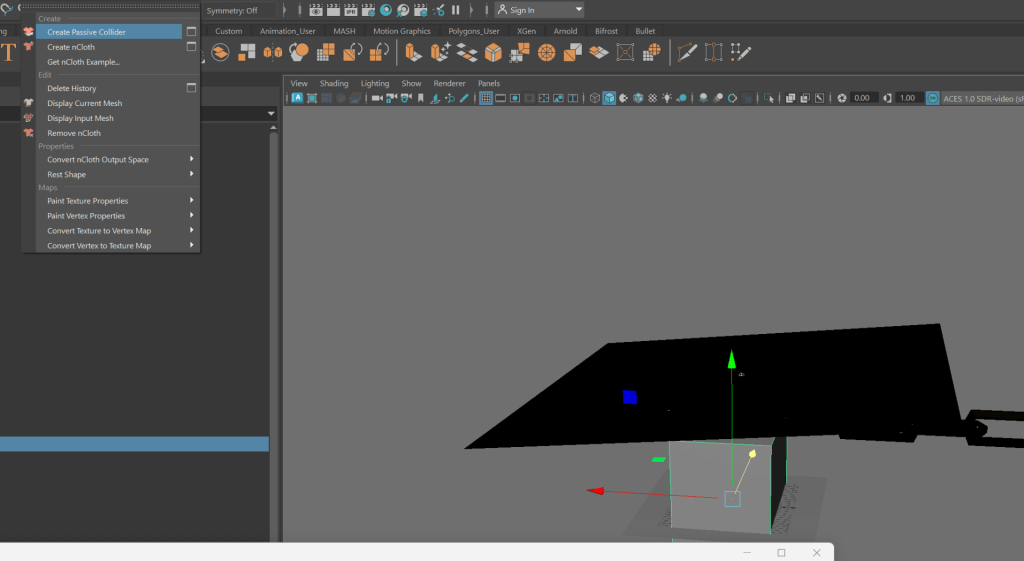 We then added a box shaped and created a passive collsion that our plane would be able to interact with and not fall through.
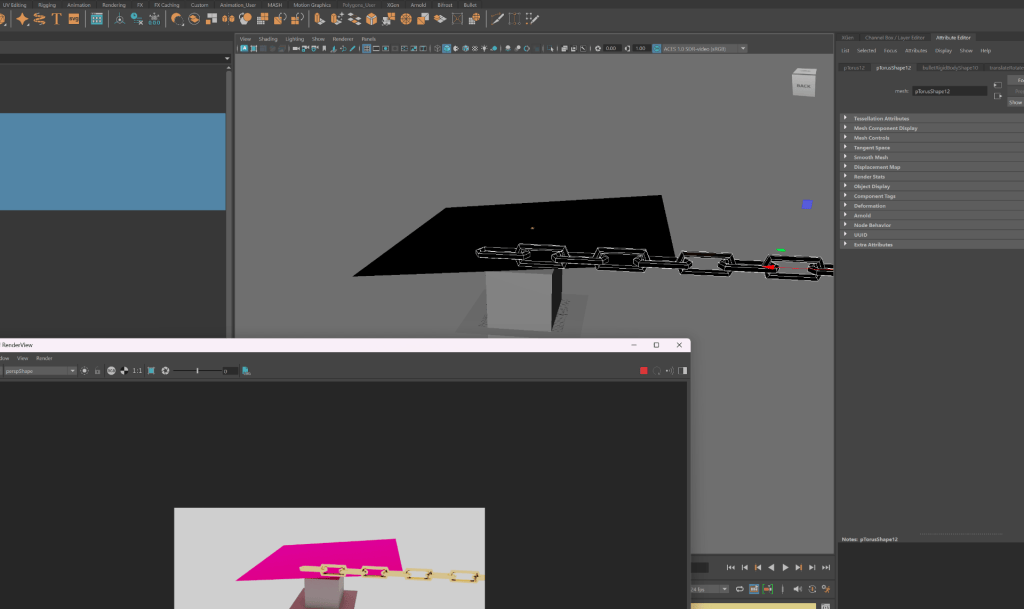
This method allows for use to create flags and cloth that can be used for something we have modelled and allows it to be more accurate.
To create a flag
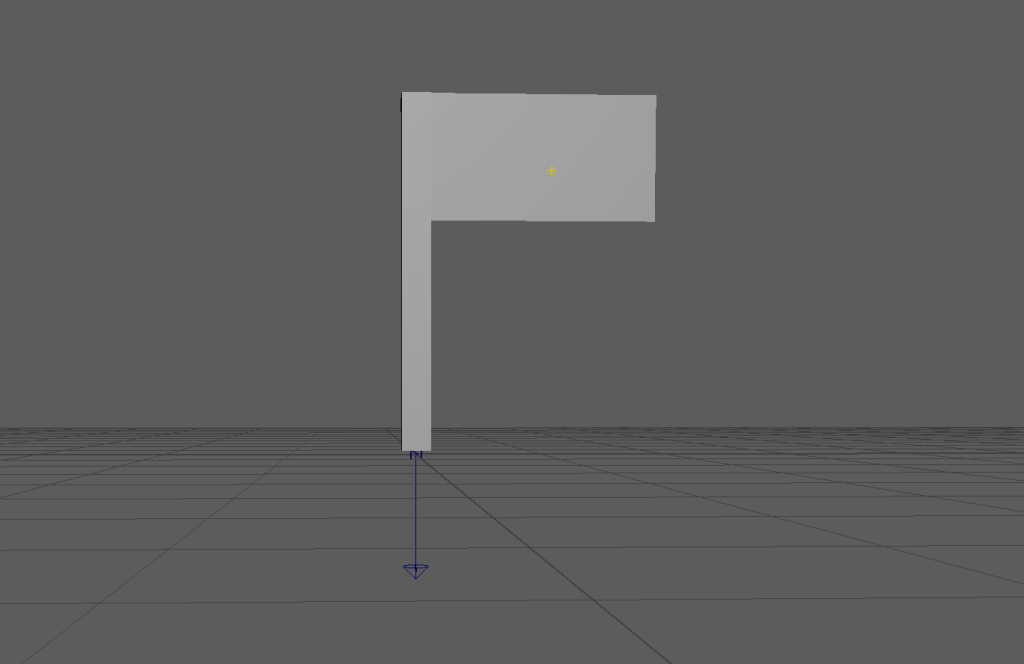
i added a box and extruded it into a pole, and the added a plane and extruded it to look like a flag. i then added ncloth to the flag and made the pole become a passive collider.
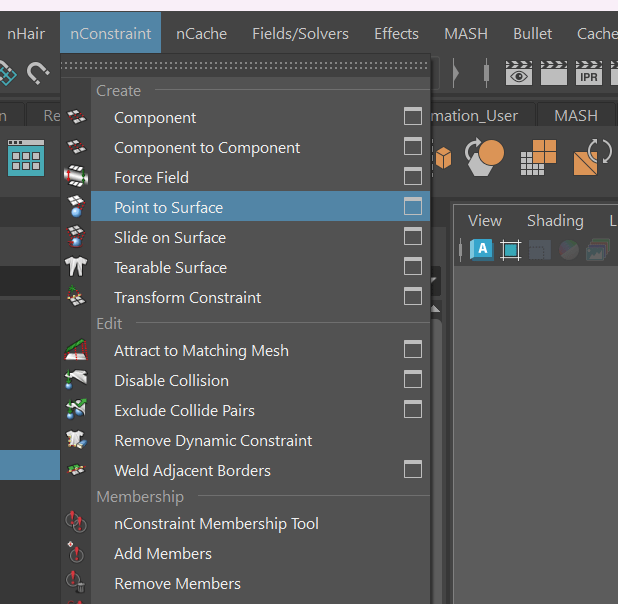 After that i highlighted the vertex’s, help shift and then clicked on the pole which then let me create a Nconstraint to attach the flag to the pole by using the point to surface.
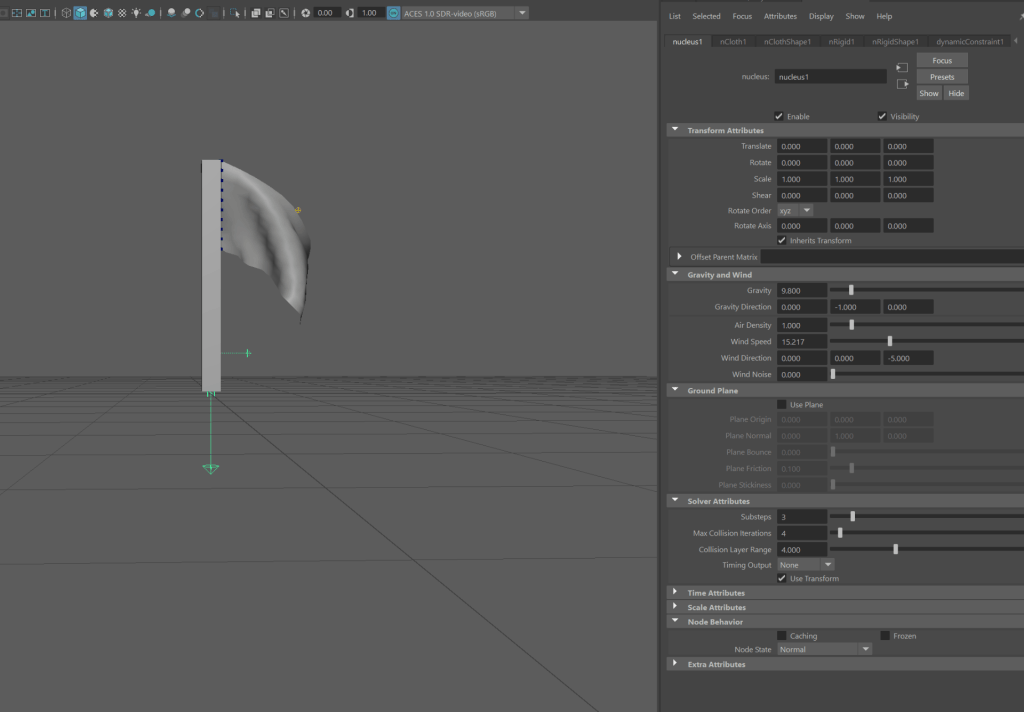 Once they were connected i made the wind direction -5 and increasd the wind speed this allowed the flag to blow in the wind.
WEEK 13
nParticles and Fluid Systems
ASSIGNMENT 1: SHOWREEL
ASSIGNMENT 2: JAMES BOND
FINAL INTRO JAMES BOND:

